
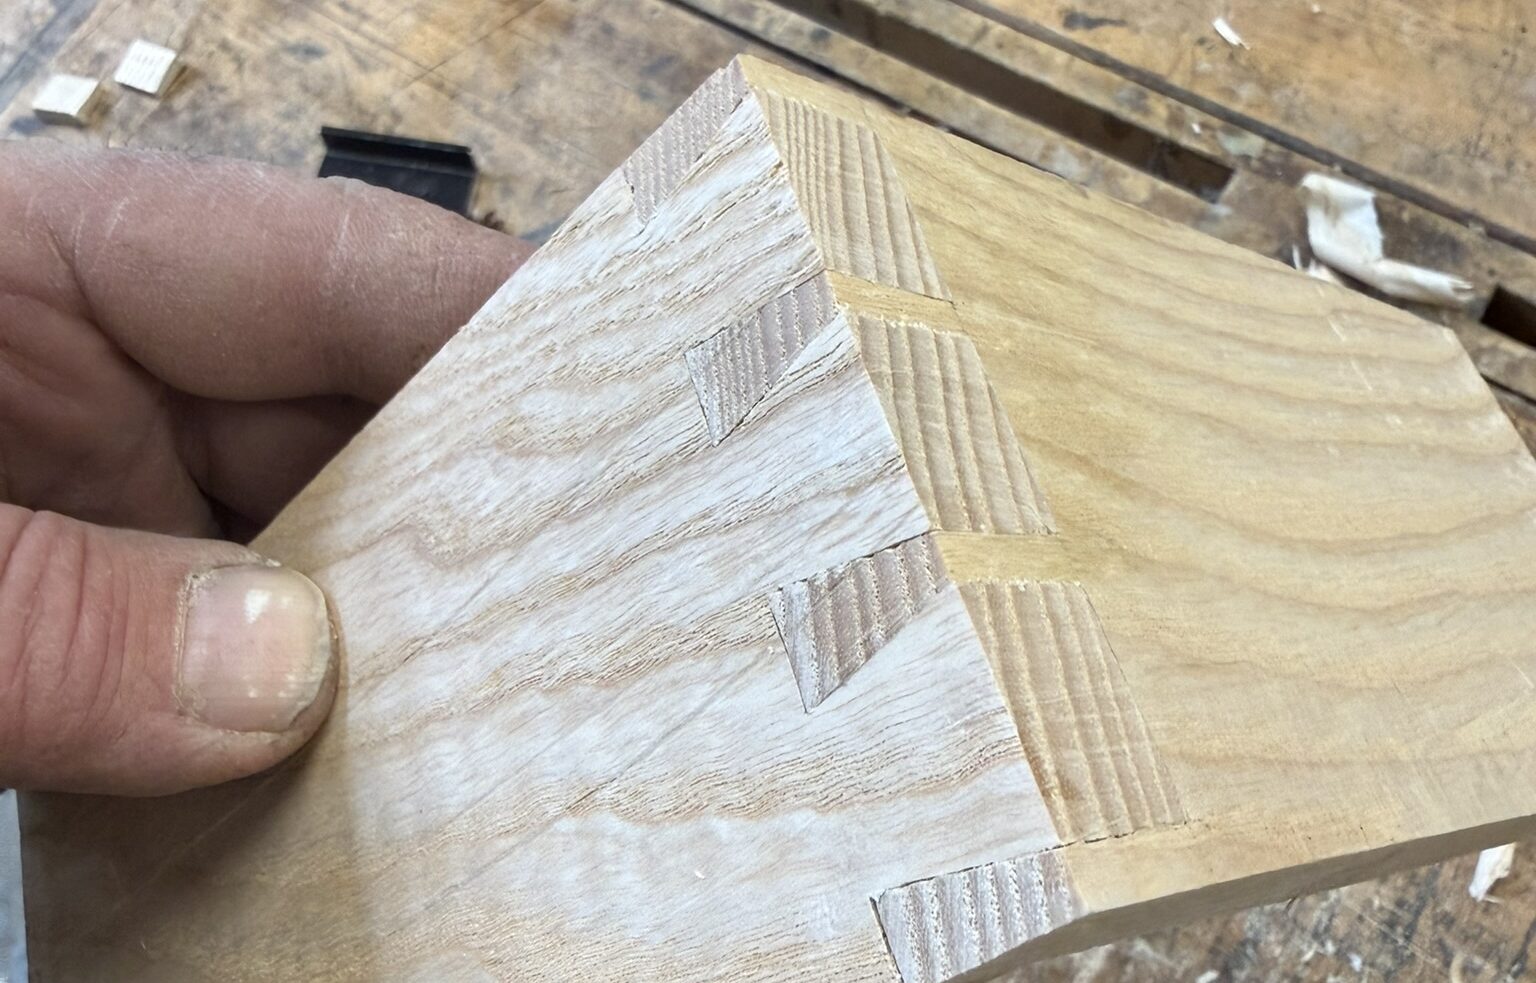
Stage 1: Marking the Parts
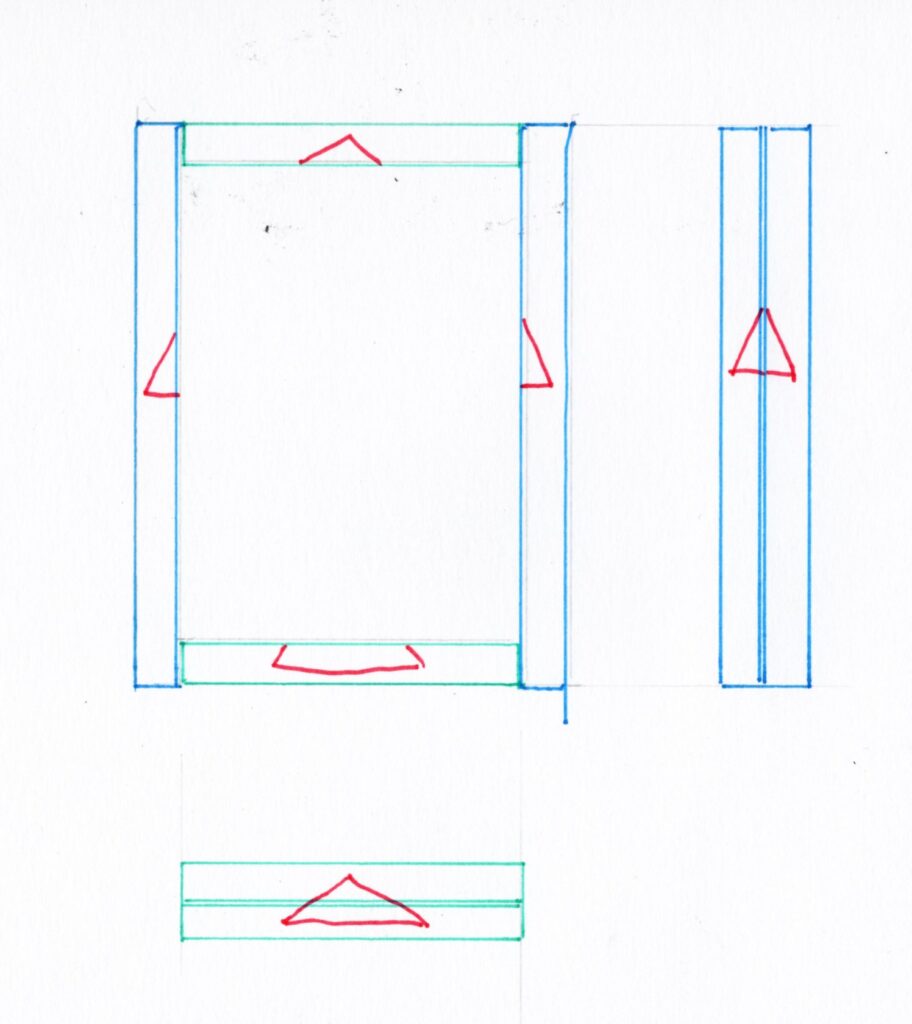
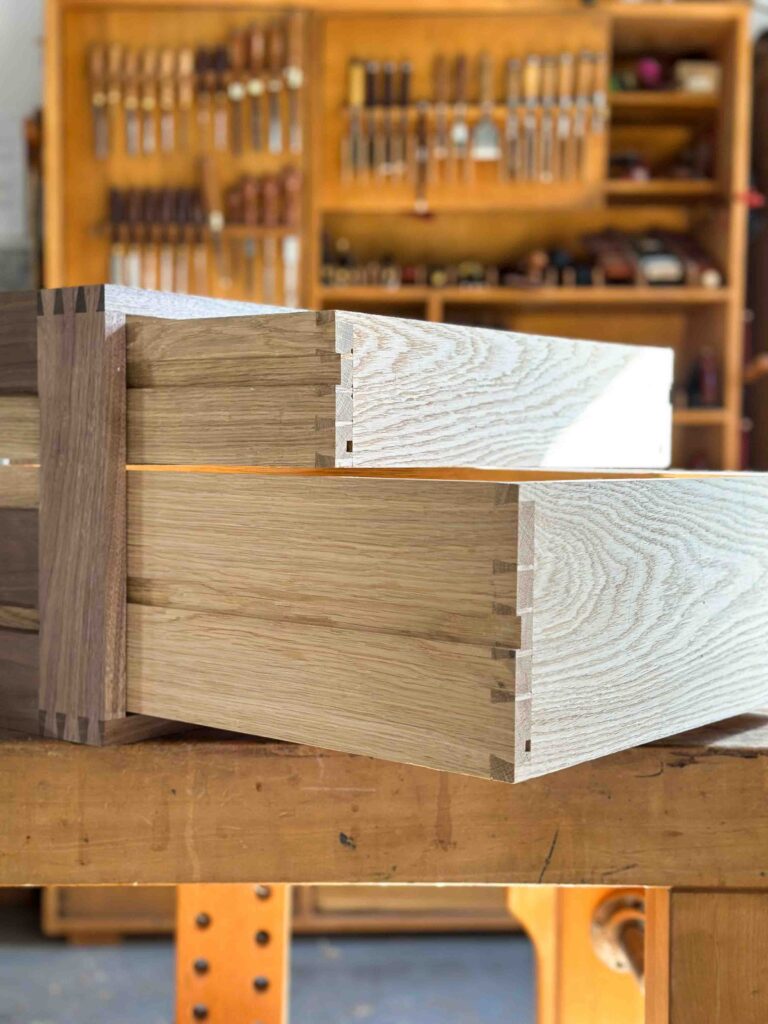
The first stage of marking out is correctly identifying the parts. For this I use a cabinetmaker’s triangle, both when making a box construction (a box, a drawer) and when making a simple “L” joint. In the case of a box construction, it looks as shown in Figure 1.
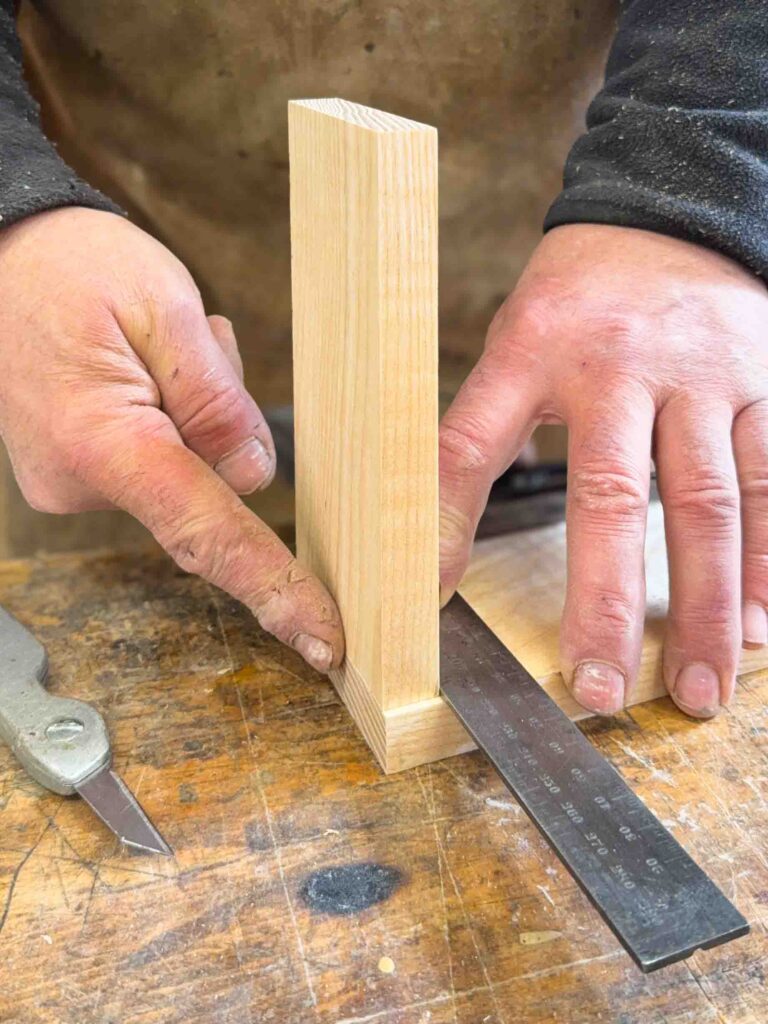
In the case of an “L” construction, the markings look as shown in Photo 1.
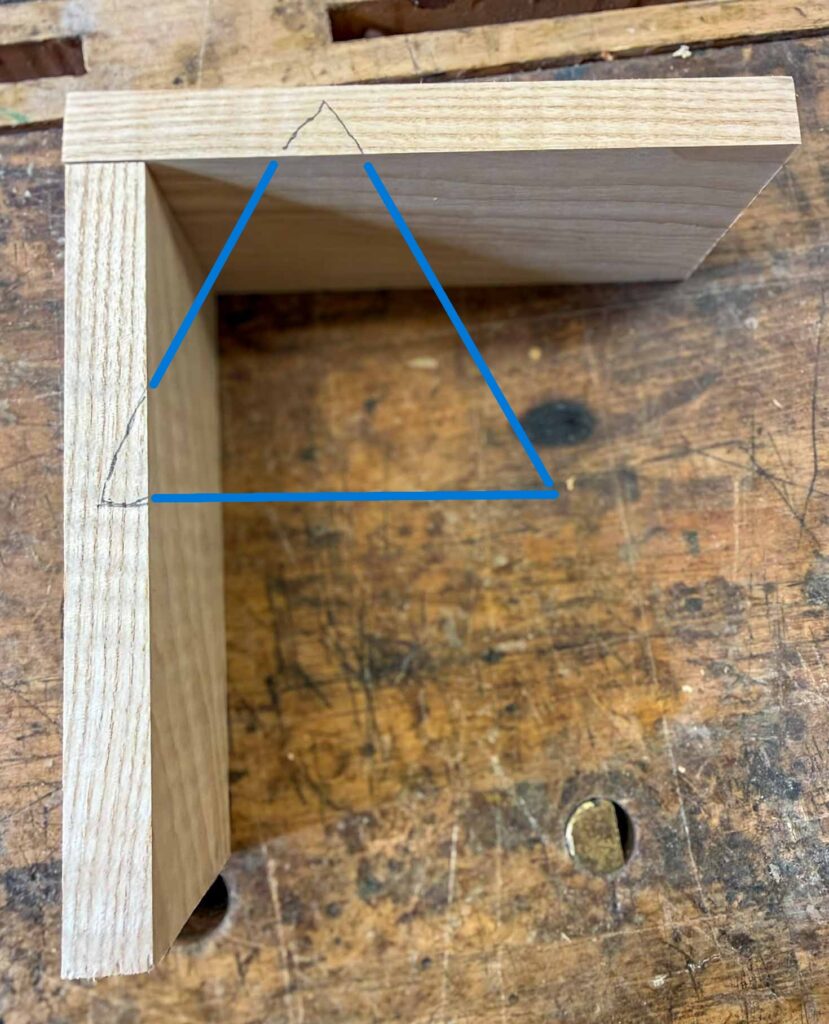
In both cases, the markings I use define all the parts unambiguously in relation to one another. The markings always complete one triangle. In the case of the upper left corner in a box construction or “L” construction, the upper part marked with the upper half of the horizontally divided triangle joins the left part – the upper half of the vertically divided triangle. This creates a clearly defined marking system that helps avoid mistakes when making the joints.
When marking the parts, remember the following:
- the parts are joined on the end grain,
- we inspect the parts and, depending on the project, choose the more attractive faces of the boards for the more visible sides,
- the faces on which the markings appear (the cabinetmaker’s triangle) also become the reference edges (see basic principles of marking out in woodworking), which makes marking out much easier. If necessary, we true them first,
- the outside and inside of the triangle indicate the outer and inner faces of the parts,
- the parts do not have to be of equal width provided that, when transferring tails to sockets, we always align them from one side only, preferably from the marked side.
With the parts marked in this way, they are ready for dovetail marking out.
Stage 2: Marking the Baseline
In dovetail joints, the baseline defines the height of the tails and is transferred from the thickness of the corresponding part, most often using a square or a marking gauge.
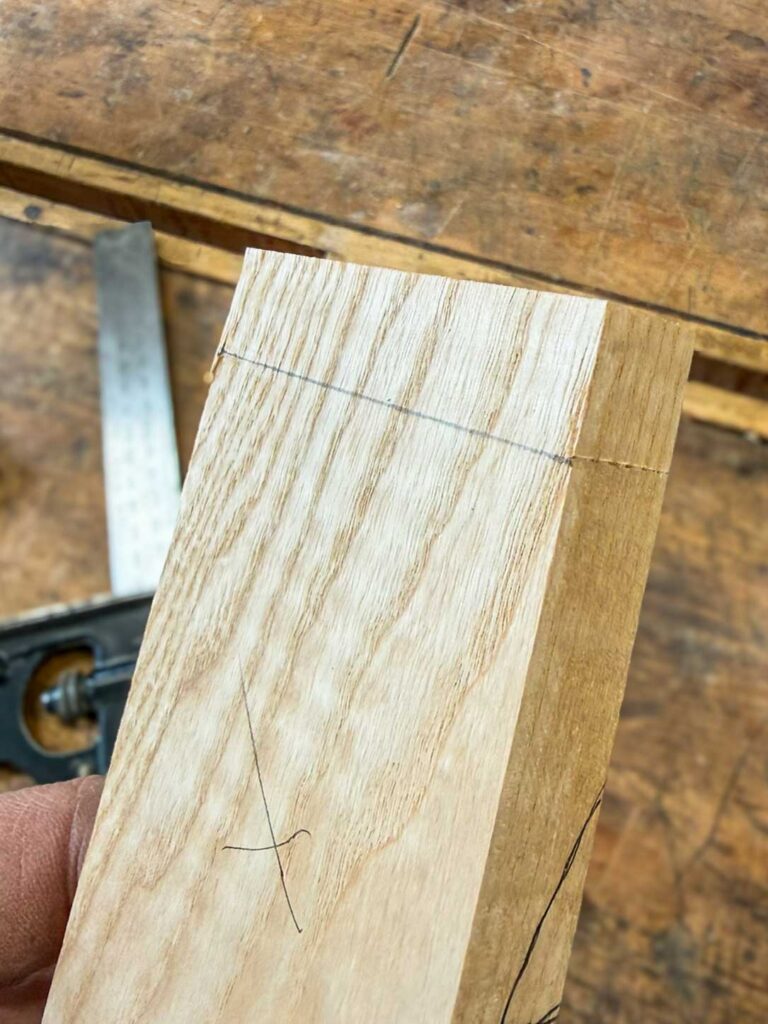
I begin marking out the tails by marking the baseline of their bases. To do this, I transfer the thickness of the corresponding part, as shown in Photo 2.
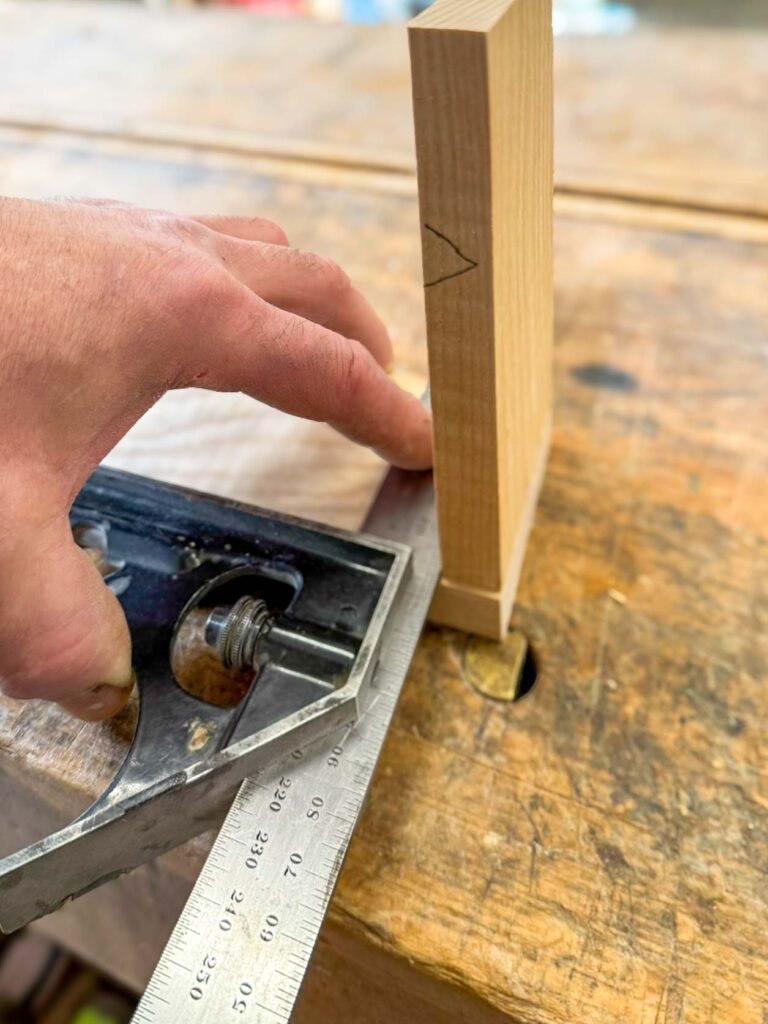
I do this from the inside face of the part so that I can scribe the line precisely with a knife. To do that, I place the square against the reference edge and, while checking the contact with my finger, establish the position of the square from the outside.
Tip: If, on the part where we are marking the baseline, the side edge is not at a right angle to the reference edge, make sure that the corresponding part is fully hidden when marking the baseline. Later, during truing and cleaning up the part, we will remove any irregularities. Tip: A slight shift in the baseline can be used deliberately to achieve a desired effect. If the external dimension of part (A) matters most, we reduce the depth of the baseline on those parts. After glue-up, the tails will sit hidden in the sockets, and during flushing-up we remove material from part (B) down to the end grain of part (A), while preserving its external dimension.
Once I have established the position of the square, I remove the vertical part and scribe the line with a knife. I then continue the marking-out around the entire part according to the principles described in the article marking shoulders in woodworking with a square, with one difference: on the outside face of the part (the outside of the triangle), I temporarily mark the line in pencil. I do this so that, once the part is completed, no marking lines will be visible on the outside. The internal lines will not be visible, and the side lines will be cut away.
At this point, we have the baseline marked out. In the case of box parts (a drawer, a box), one more issue appears: ensuring equal internal dimensions on opposite sides of the box, that is, ensuring a rectangular internal section. There are two ways to achieve this.
The first method is to use a marking gauge. Here, we prepare the parts so that they have the same length and a rectangular section, and then instead of the square-based method described above we can use a marking gauge. It should be remembered that, with a marking gauge, using it on edges that are not square to the reference edges will transfer an error during marking out. That makes this method a longer one, even though marking with a gauge itself is quick and pleasant.
The second method is to mark out with a square, as described earlier. To do this, we choose the shorter part from the appropriate pair (in Figure 1, the parts marked with the same colour) and mark the baselines from both sides of the shorter part. Then we bring the parts together so that the shorter part does not protrude from either end, and transfer the marked distance from the shorter part to the other one.
Tip: I rarely use marking gauges when marking out dovetail joints. Their use requires the precise dimensioning of all parts in terms of reference edges, length, and right angles in every section. This makes the method longer than using a square, where exact dimensioning outside the two reference edges can be omitted.
Tip: Sometimes a box construction also acts as a spacer between two tops. In that case, to ensure an equal distance between them, I first dimension precisely the parts that form the spacer (most often the vertical parts) of the box construction. Then, without risk, I use a marking gauge to mark the baselines.
Stage 3: Marking Out the Tails (Dovetails)
There is no single universal scheme for laying out dovetail joints; the arrangement depends on the function of the part – symmetry is generally preferred in hidden constructions, while visible work allows greater aesthetic freedom.
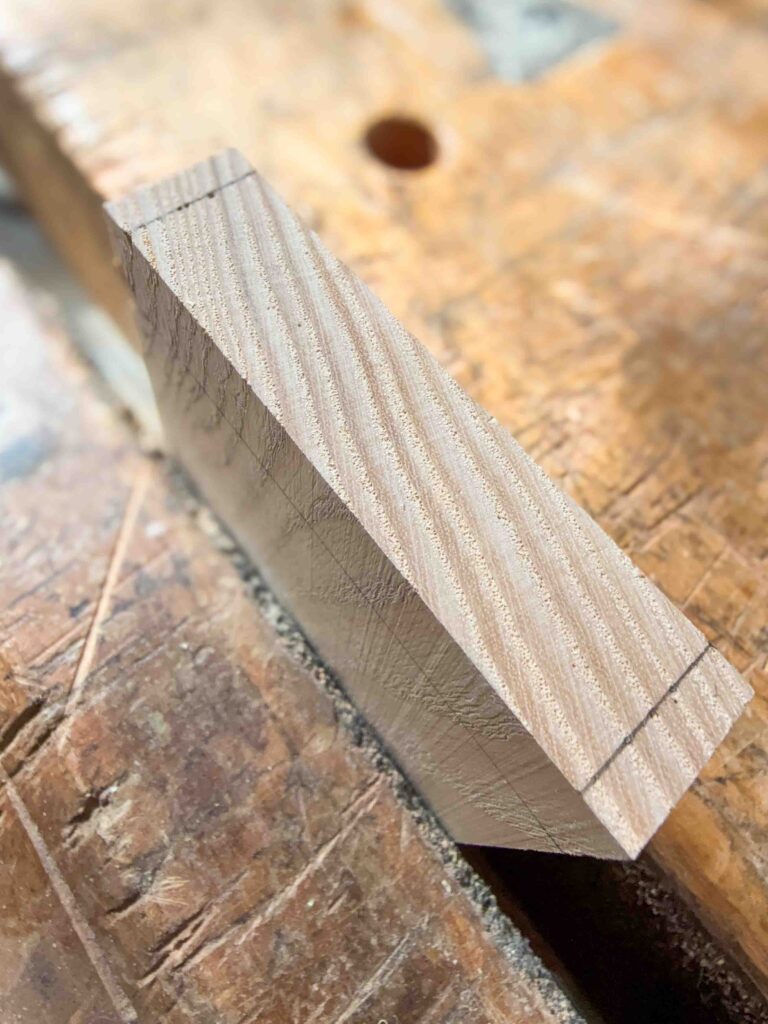
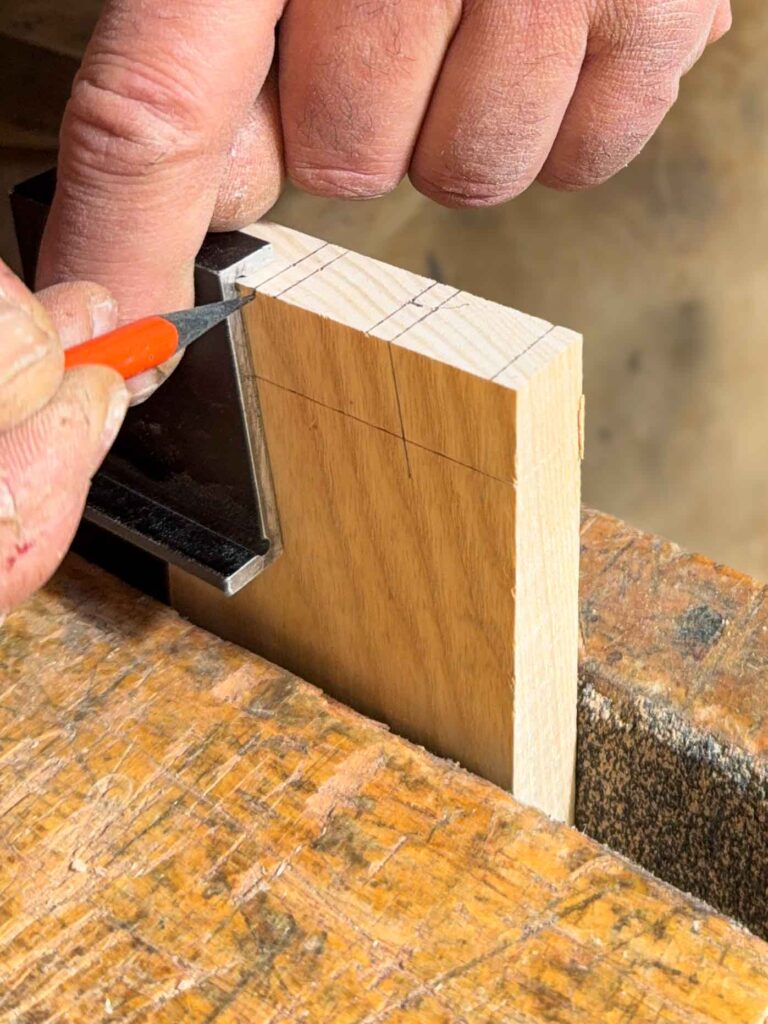
For marking out the tails, I use a pencil. According to my philosophy, I use a pencil only when precision is not my primary aim. Strange? No, because at this stage precision lies elsewhere. More on that in the next part of the article. I begin marking out the tails by establishing their setback from the edge. I usually use about 5 mm, as shown in Photo 5.
Tip: If you are housing a bottom into, for example, a drawer, remember that a larger setback usually forces the bottom to be seated deeper. The groove for the lid is most often made within the opening of the tail so as not to damage the pins on the corresponding part.
Now it is time for the layout. There is no universal formula for establishing it. From a technical point of view, a greater number of symmetrically arranged tails can increase contact area and joint stiffness, but excessive subdivision weakens the pins and makes the joint more difficult to execute. Here, sound judgment and experience should guide us.
Tip: Wherever the joints will not be visible and strength matters most, I use even, symmetrical spacing at roughly 2-3 cm intervals (Photo 6). In visible elements, such as a drawer, aesthetic considerations often prevail, because even a less symmetrical layout provides more than enough strength for the loads it will encounter in practice, as shown in Photo 7.
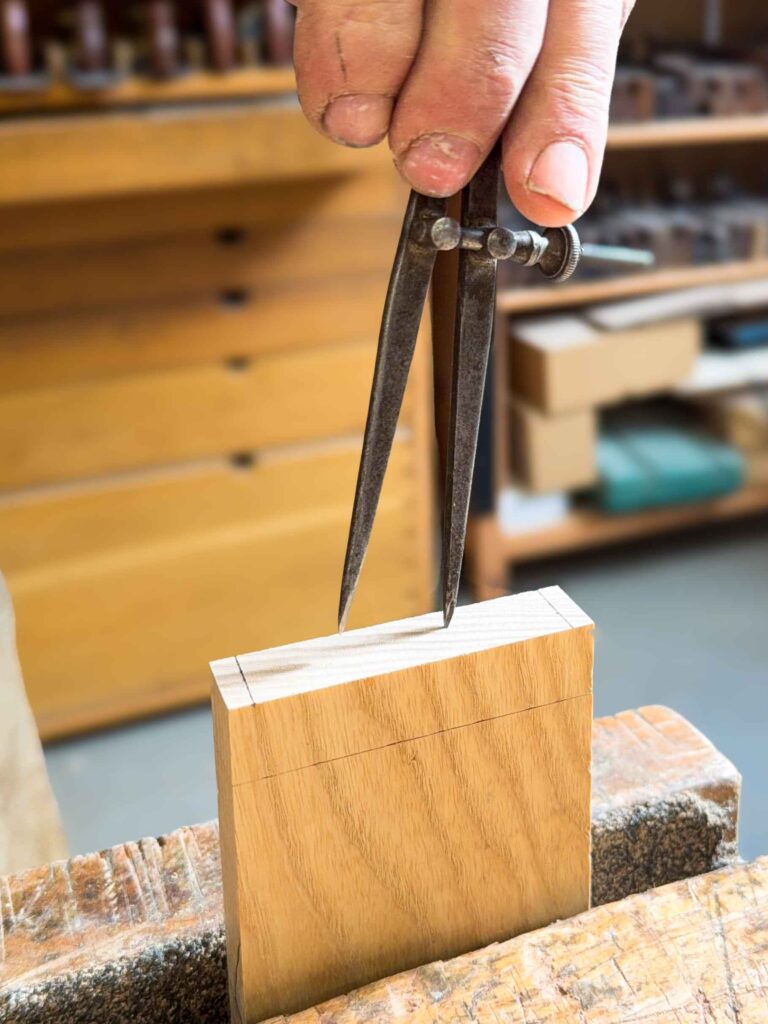
We can establish the layout by eye, with a rule, or with dividers, as shown in Photo 8. There are also special gadgets for laying out symmetrical divisions. I do not own them and do not see any reason to use them.
Dovetail Angle and Templates
Typical dovetail proportions are 1:6 for hardwood and 1:8 for softwood, although in practice small deviations from these values do not significantly affect the strength of the joint.
If we’ve already settled on the layout, the next question is choosing the dovetail angle. Many traditional woodworkers cut dovetails more by eye than by strictly following fixed angles. I work primarily with hardwood and use a 1:6 ratio.
In the literature, you’ll find different proportions suggested—for example, 1:8 for hardwood and 1:6 for softwood. In practice, a few degrees one way or the other doesn’t make much difference.
In my method, I don’t refine the sockets with a chisel after sawing, and visually, the 1:6 angle simply looks right to me.
We have several types of templates available. Each has its own advantages and disadvantages.
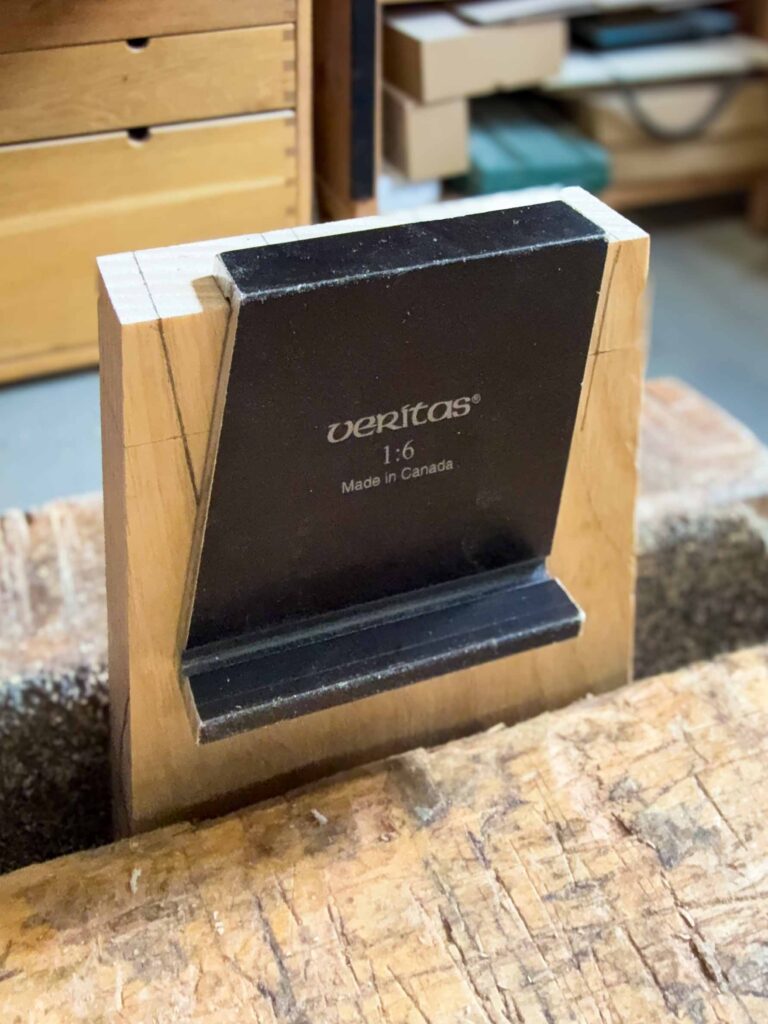
Template 1, shown in Photo 10, allows you to mark both the square line on the end grain and the angled line on the sides at the same time. It has one important drawback – to mark the next line on the left side, I have to move the guide far to the left, largely beyond the marked part (Photo 10). With small dovetails this causes problems and consequently leads to errors, because the template hangs in the air and rests on only a small portion of the part.
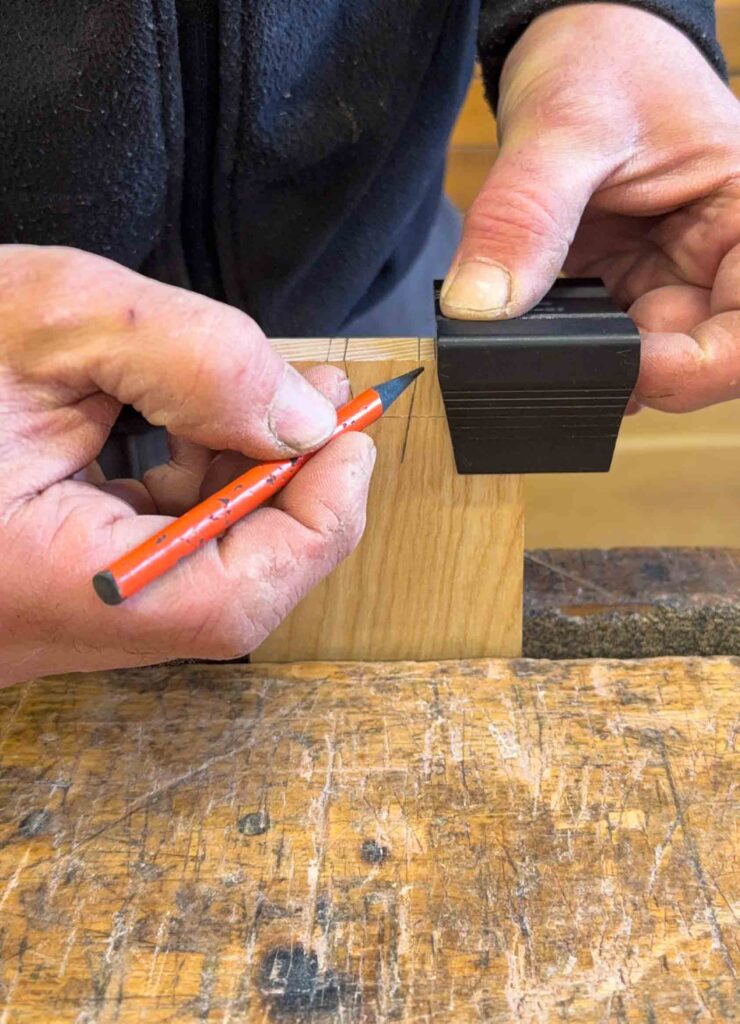
Template 2, shown in Photo 11, eliminates the drawbacks of the first. We mark the lines in one direction (Photo 12), and with this template we can do so from either the left or the right side. As a result, the template always rests with its full surface on the part. After marking all the lines, it is enough to turn it upside down to change the angle and mark the remaining lines in the other direction (Photo 13).
The drawback of this template is that it does not allow the square lines on the end grain of the board to be marked at the same time.
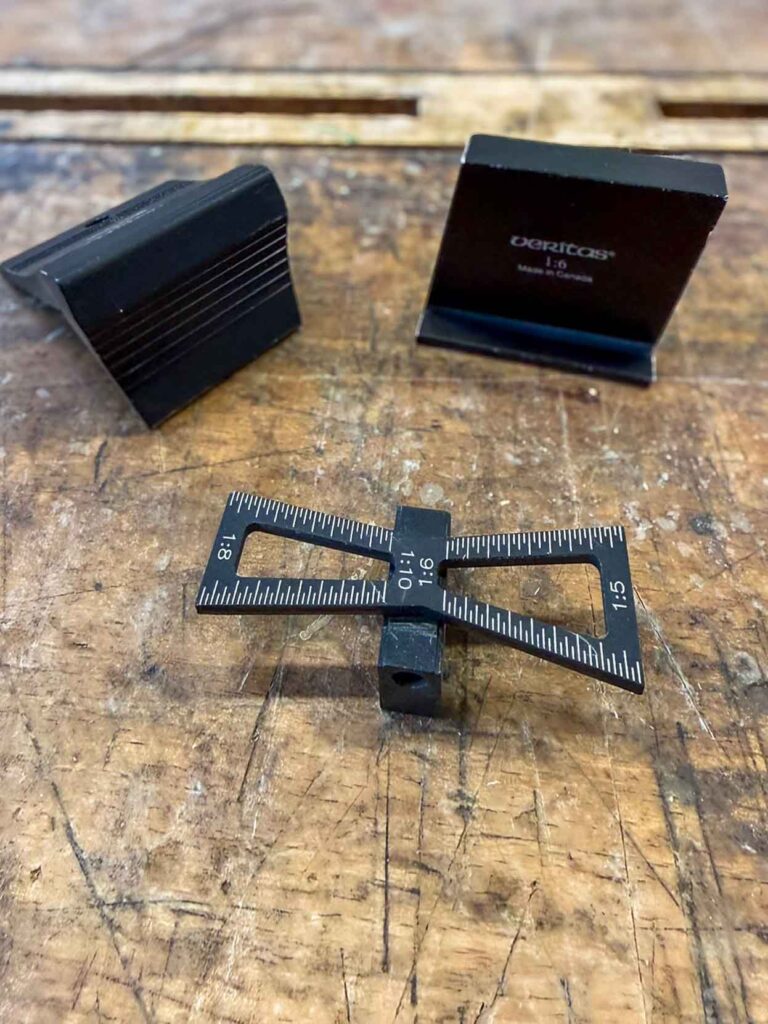
Template 3 is a universal template with as many as four ratios (Photo 14). That is its advantage. Apart from that, you have to be very careful not to confuse the ratios, and the foot is rather small.
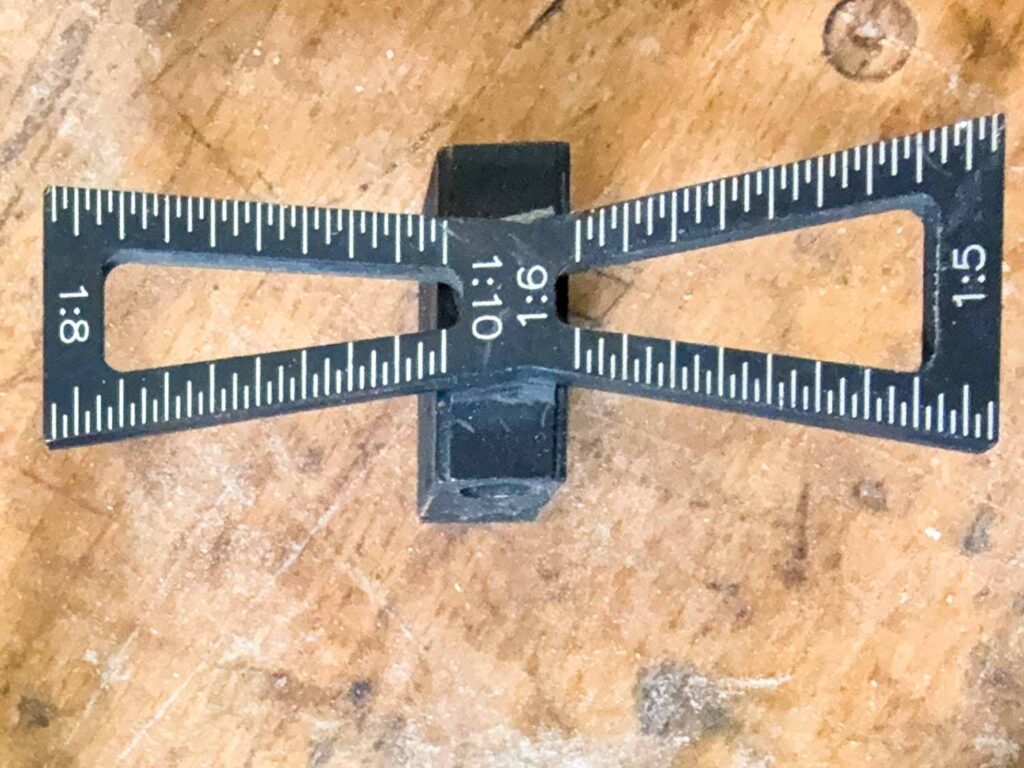
Photo 14. Universal template for marking out dovetail joints.
It is possible to make such a template yourself, for example from wood; it is not especially complicated.
As I mentioned earlier, I mark out dovetails with a pencil. Even so, I take care of the following points:
- the line on the end grain of the board should be drawn as precisely as possible at a right angle, either with a template or with a square,
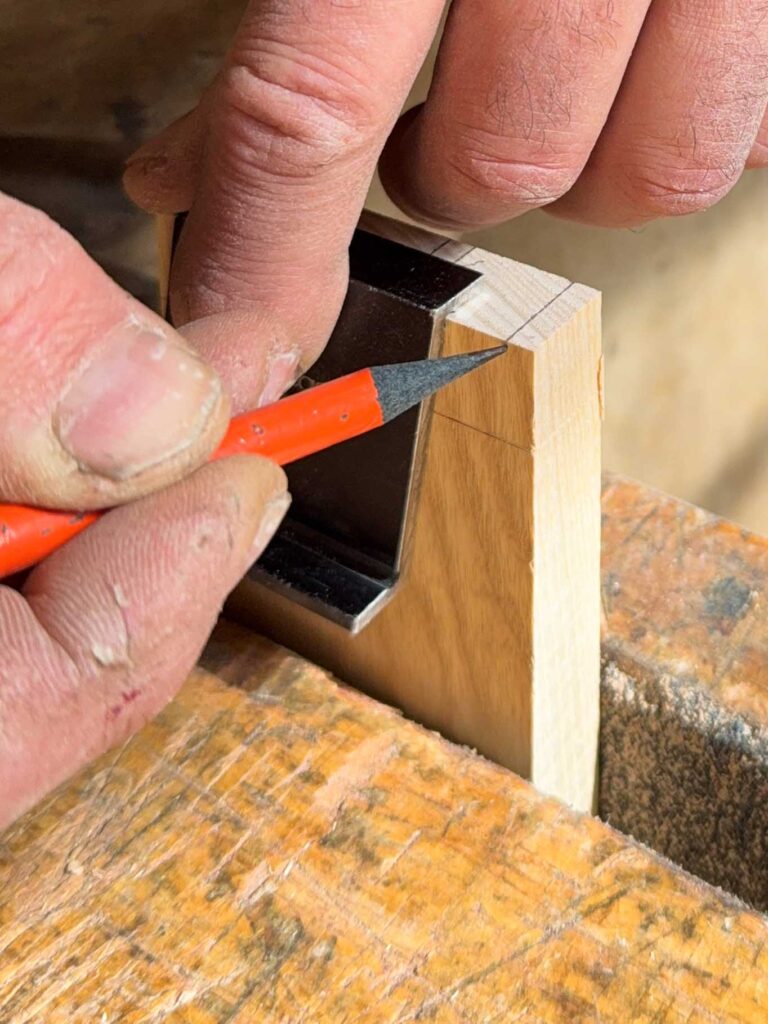
- the side lines should meet the line previously established on the end grain of the board. To achieve this, I first place the pencil on the board at the point where I feel the side line will meet the line on the end grain, and only then do I place the dovetail angle template (see Photos 12 and 13),
- I usually extend the side lines beyond the previously established baseline of the dovetails – this later helps in judging the correctness of the saw cut on the sides of the tails, especially if the sawing has damaged the marked lines.
Tip: In box constructions such as drawers, if there are no contraindications, I mark out and then immediately cut the tails on both matching parts at the same time. This clearly shortens the working time and improves the feel for squareness on the end grain of the parts.
Summary
In work on dovetail joints in woodworking, the quality of the joint is decided at the marking-out stage, where the geometry of the joint is created and the boundary between material and waste is defined. In my experience, this is where all the most important decisions are made – the later stages are only their consequence.
Marking out brings order to the entire woodworking process. A lack of precision at this stage will come back to punish us and will affect either the fit or the appearance of the joint. That is why I attach so much importance to this moment – the conscious definition of lines. This is exactly what I teach in my carpentry courses. The next stage of the work will be cutting the tails – you can find the post here: Dovetail joints – cutting tails step by step (part 2) – Bensari Workshop
FAQ
How do you determine the spacing of dovetails?
Dovetail spacing can be determined in several ways – by eye, with a rule, or with dividers. In practice, there is no single universal scheme. In concealed construction, symmetrical spacing is often preferable because it can increase stiffness, whereas in visible elements greater freedom is possible and appearance may become the main consideration, especially when the parts are not exposed to heavy loads.
What angle should be used for dovetails?
Nowadays, with the tendency to frame everything in engineering terms, the literature recommends a 1:8 ratio for hardwood and 1:6 for softwood. In practice, small deviations from these values have little effect on the strength of the joint.
I use a 1:6 ratio, as it appeals to me most aesthetically. In the end, proper layout and accuracy of execution matter far more than achieving a perfectly precise angle.
Should dovetails be marked with a pencil or a knife?
Both tools are used, depending on the stage of the work. The baseline should be marked with a knife, either at the beginning or after the tails have been cut, because it determines the accuracy of the joint. The tails themselves can be laid out with a pencil, provided that your hand is steady and that you do not intend to refine them with a chisel after sawing.
What matters more – marking out or cutting?
Definitely marking out. This is the stage at which the geometry of the joint is established and the most important decisions are made. Cutting is only a reproduction of the previously defined lines. Even very precise sawing will not correct mistakes made during marking out.
How can mistakes in dovetail marking out be avoided?
The most important thing is to mark the parts unambiguously, for example with a cabinetmaker’s triangle, and to work consistently from the reference edges. It is also worth making sure that the relevant lines meet properly and remain clearly visible. A useful habit is to extend the lines slightly beyond the baseline, which makes visual control during sawing easier.
Is it necessary to use dovetail templates?
No, but they make the work much easier, especially at the beginning. Templates help maintain a consistent angle and reduce the risk of error. With experience, some woodworkers begin to establish the angles more by eye, especially where the joint will not be visible.
