
We continue our series of articles dedicated to hand tools in woodworking. This time we focus on marking out and the accessories that ensure precision in this process.
What is Marking Out?
Marking out is the process of drawing lines on the surface of a material – in our case, wood – to enable precise machining. We mark out to define the shapes and dimensions of components, joinery, or holes.
Marking out is the most important stage in woodworking; the precision of our joinery and the entire project depends on it. In fact, it’s not the plane, router, or saw that determines the quality of our furniture, but these modest marking tools. Therefore, we should give the most attention to marking out. Poorly drawn lines can ruin a project or at the very least cause a lot of trouble and prolong the entire process.
Wood Marking Tools
In previous blog posts, you’ll find an article dedicated to basic hand tools, including marking tools – Basic woodworking tools – where to start? – Bensari Workshop
Among the most important marking tools and accessories are:
- pencil,
- marking knife,
- marking gauge,
- square.
In today’s article, we’ll discuss the knife and square as basic marking tools.
Principles of Precise Marking Out
- If possible, clamp the workpiece securely.
When preparing to mark out wood, try to eliminate all factors that could negatively affect the result: instability, uneven surfaces, etc.
- Don’t try to adjust your body posture to the clamped piece.
I often see woodworking students twisting their bodies to make another mark with their right hand over their left shoulder. Such gymnastics will quickly backfire. It’s not about our comfort, but about accurate marking. That’s why in such cases, we reposition the workpiece in the clamp to complete the marking confidently and precisely. Accept that the workpiece will be repeatedly inserted and removed from the clamps. Paradoxically, this saves time.
- Make sure your square actually shows a true 90° angle. I’ll write more about how to check this in a separate post.
- Always use sharp knives.
Knife or Pencil?
It’s worth considering when to use a marking knife and when to use a pencil. Of course, I’m sharing my personal and uncompromising view on joint quality.
Using a Pencil for Marking
Generally, a pencil is used where precision is not critical (lines that won’t be visible or don’t impact the furniture’s quality). I use a pencil for:
- preliminary marking,
- labeling parts,
- marking hidden cut lines for tenons.
The advantage of pencil marks is speed and that they don’t damage the wood—except for thin mechanical pencils, which can dig into the grain. The disadvantage is that the lines are undefined, varying in thickness depending on the angle or sharpness of the pencil. Also, pencils tend to jump on the wood grain. Basically, if you can see the pencil line, you’ll also see a gap in the joint.
I use regular wooden HB pencils. I dislike thick carpenter’s pencils. It’s important to me that pencils are brightly colored so I can quickly find them in the workshop. I rarely use thick pencils—usually for rough marking on dirty boards straight from the sawmill.
Additional Pencil Options
In daily work, I also use colored crayons and white pencils. Colored crayons help with marking parts in complex projects, while the white pencil is perfect for dark woods like American walnut.
Marking with a Knife
A marking knife is more demanding and can damage the wood, but it creates well-defined lines. You can precisely place a chisel into a knife line. The line is visible but minimal—it will close up completely when glued.
When to Use a Knife
I use a knife wherever precision in joinery is required:
- for marking outer (visible) edges of tenons and mortises,
- for outlining shoulders,
- for marking dovetail joints,
- for other visible joinery elements meant to fit tightly (I don’t use fillers or putties in my projects).
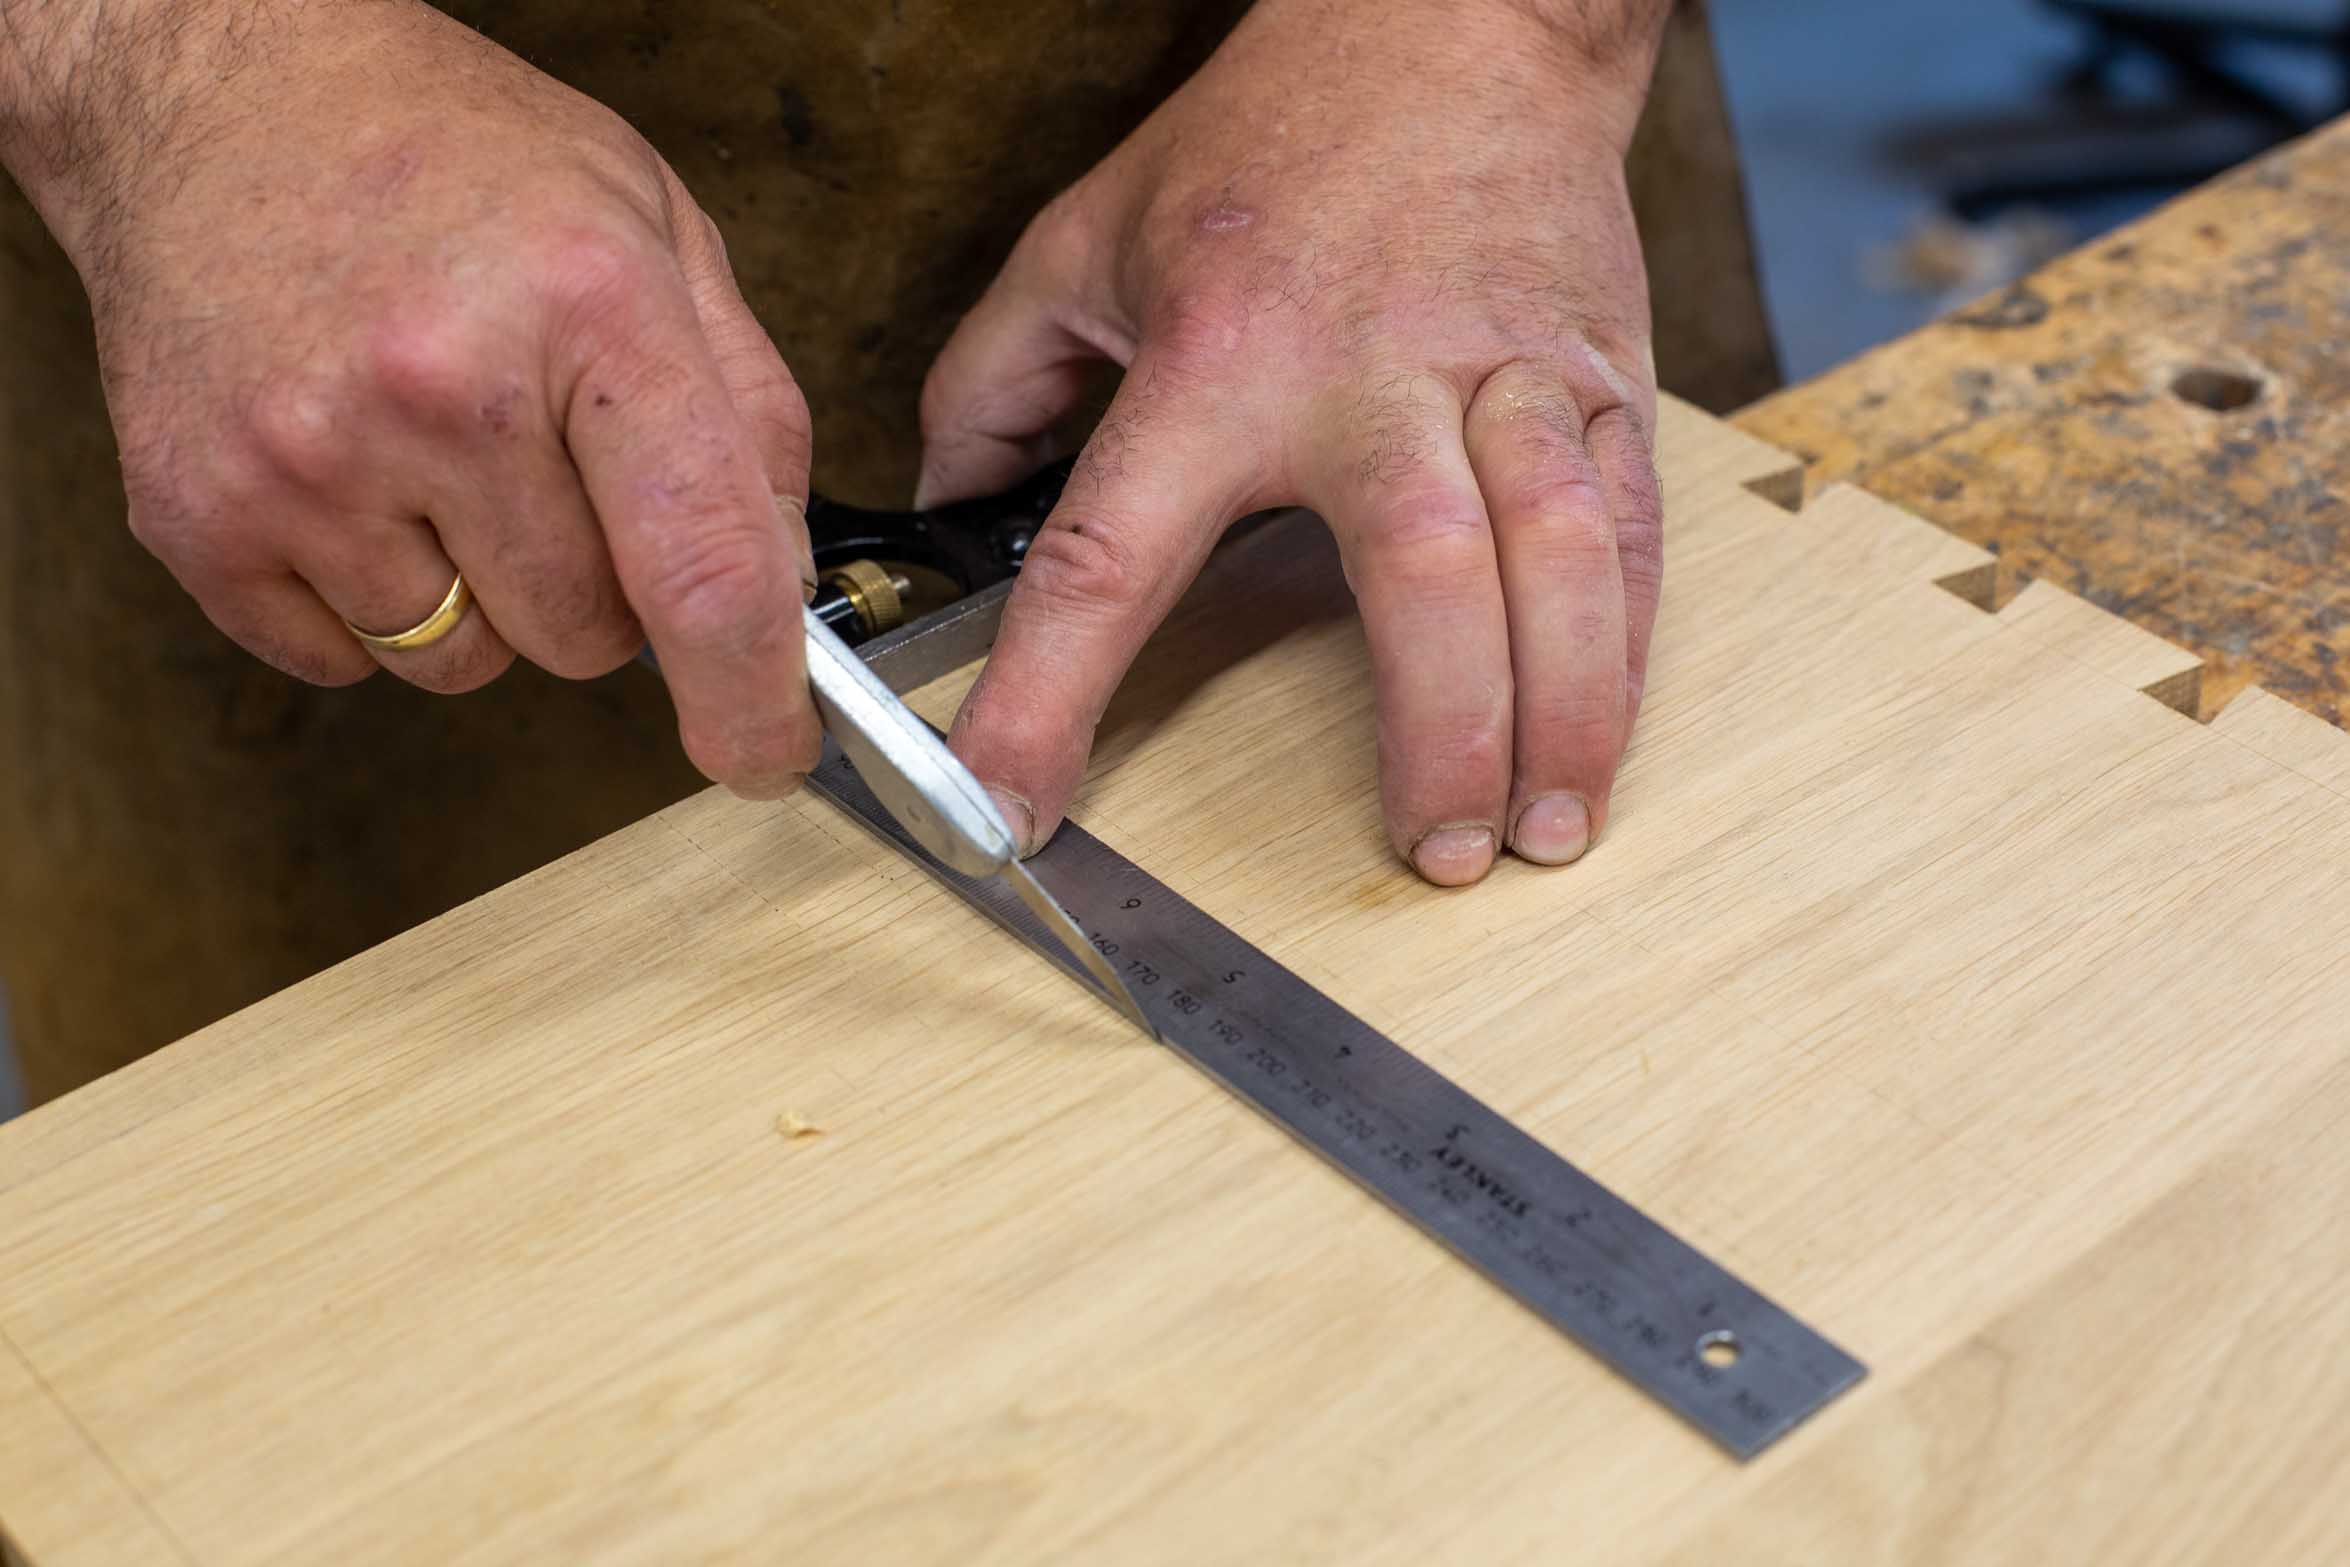
How to Use a Square Correctly?
The square may seem simple, but beginners often have issues with it. This comes from inexperience and underestimating the importance of accurate marking. Improper handling results in poor line placement.

There are two mistakes here: the angle isn’t square, and the ruler is tilted and lifted, which introduces further error.
Key Elements of Marking with a Square
- Base (stock)
Let’s start with the square’s base (stock). Good woodworking squares often have a heavy, cast-iron base. Proper placement ensures accuracy. The first grip point should be the center of the base’s contact with the wood to apply even pressure.

Make sure the square’s base touches as much surface as possible. Often, flipping the square helps.
- Counter-hold
The second grip point is the so-called “counter-hold”—two or three fingers (ring, pinky, and/or middle finger) that stabilize the wood and secure a firm grip.
- Ruler pressure
The final element is pressing the ruler firmly with the index finger to ensure perfect contact with the material.
How to Hit the Right Spot?
The counter-hold mentioned above also allows smooth positioning of the square. Avoid eyeballing. First, place the pencil or knife in the mark, then gently slide the ruler along the wood edge like a guide. Once aligned, tighten your grip and lock the ruler in place.
Try to align the square close to the knife’s point near the base. Placing it far away (e.g., 20 cm above the base) introduces uncertainty in the angle.

How to Guide the Knife Properly While Marking?
I’ll cover marking knives in a separate post. Here, let’s focus on basic principles. Mistakes in guiding the knife along the ruler usually come from not understanding the knife’s geometry. Below in Figure 1, you’ll see two knife types: single-bevel and double-bevel.
Section 1 shows a single-bevel knife (black), with the bevel facing away from the ruler. Section 2 shows a double-bevel knife. The correct method is marked A—1A and 2A respectively.

Notice that correct technique in both cases involves tilting the knife slightly away from the ruler (burgundy). With a single-bevel knife, tilt slightly. With a double-bevel knife, compensate for the bevel to keep the line tight to the base. Too much tilt can tear fibers under the ruler. Practice this motion to master it.

Tilting the knife toward the ruler or guiding a double-bevel knife straight will result in a line next to where it should be, as shown in Photo 5.

Photo 5. A visible gap between the ruler and the marked line caused by incorrect knife angle.
If you can see this gap, you’ll see a gap in the joint.
Conclusion
We’ve covered the basic marking tools: the marking knife, square, and pencil. These make up most of the marking process. Except for the compass, most other tools just complement these. And while marking is time-consuming and repetitive, it’s worth dedicating full attention to it—your project’s success depends on its precision.


One Response
Solid primer on marking out mastery in woodworking—square and knife as your precision power duo, ditching pencils for tight joints that vanish in glue-ups. Grip tips, tilt tricks, and clamp wisdom make accuracy a breeze; essential for flawless hand-tool magic!