
Square – marking shoulders in woodworking
Marking shoulders may seem simple, yet there are many misconceptions and oversimplifications around it. As part of the series on hand tools, including combination squares, we will take a closer look at how to correctly mark shoulders in a mortise and tenon joint.
What is a shoulder in woodworking joints?
A shoulder is the part of a woodworking element that forms the transition from the main section to the joint.

The main functions of a shoulder in a woodworking joint are:
– hiding imperfections of the joint,
– improving the aesthetics of the connection,
– ensuring tight and gap-free contact of surfaces.

They are most often found in mortise and tenon joints – a properly made tenon shoulder connects aesthetically with the surface of the element containing the mortise, as shown in photo no. 3.

How to mark shoulders?
To mark shoulders, you need basic hand tools:
– a square,
– a marking knife,
– optionally a marking gauge.

Why not a pencil? Because only a marking knife allows precise, well-defined lines. Details can be found in one of the previous blog posts: Marking out – basic principles – square and knife – Bensari Workshop.
Properly marked lines, on the basis of which the above shoulder was cut from the tenon, must lie in the same plane.
Three ways of marking shoulders
- Marking on a finished, geometrically correct element
The first way to mark a shoulder is to draw lines around an element that has already been properly made and checked geometrically. This means we trust that all sides of the element are flat planes, and all edges are parallel to each other. In such a case, neither the order nor the way the square is applied matters.

But what if the element is not perfect geometrically, sides are not flat, or edges are not parallel? Then marking a proper shoulder will be impossible and usually ends with an error like in the drawing below.

The error marked with a red circle depends on the degree of non-parallelism of opposite planes. Usually small, but significant enough to affect the marking. So can we avoid the need for perfect geometry? Yes. We have two more methods.
2. Marking with a marking gauge
The second method is to mark the shoulder using a marking gauge. Since the ends of the element were cut at right angles to its sides, or this angle was corrected with a shooting board, we can mark the shoulder with a gauge.
The drawback of this method is the need to prepare the end grain surface first, which can be difficult on large sections. Another disadvantage is the risk of error on very small sections. The advantage, however, is the speed of marking.

3. Marking based on two adjacent reference surfaces
The third and most universal method is using two adjacent reference surfaces. Why the most universal?
Because:
- We don’t need a geometrically perfect element
- We don’t need to plane the end grain flat
- It allows marking shoulders on tapered parts, like table legs
- We save time
How to mark a shoulder
First of all, we must choose and prepare two necessarily adjacent reference surfaces. If none of the sides are flat, we must plane them first. Why? Because lines marked from two adjacent flat sides will be parallel to each other.

On the same principle we need another, adjacent surface in order to mark two more parallel lines. In this way, regardless of the condition of the other sides of the element, the marking will be successful.
Why is preparing a reference surface so important?
Wood is a natural material interacting with its environment. It is difficult to expect that after processing, even with hand tools, it will keep its dimensions forever. Growth stresses, humidity, and other factors influence its movement and continuous dimensional changes. Machine processing also has its accuracy limits and depends on many factors, not only on the quality of equipment. For example, planing boards with very diverse grain can result in thickness errors of around 0.2 mm. Additionally, snipe makes proper marking impossible. All this means such elements are far from the geometric perfection needed for marking correct shoulders.
Any unevenness can affect the marking lines, preventing them from forming the correct shoulder plane. In Figure 3, the front edge had a small defect at the top right (a slight slant along the red edge). Marking from this side will not lead to a correct shoulder – the lines will not meet on the right side, even though the green lines were marked at the same angle from the shaded side, which is not flat.

What happens if we skip reference surfaces when marking?

If two opposite lines (green and red) are marked from different sides of the element (A and B in Figure 2), and these sides are not parallel, there is no way these lines can define a correct shoulder. In Figure 2, the green line was marked from surface A and line X, while the red line was marked from surface B to line X. On side B it is impossible to connect the red and green lines at a right angle!
Many may be surprised, but the angles between the surfaces do not matter at all. Therefore, our considerations apply to any element with a quadrilateral cross-section.
Stages of marking a shoulder
1. Choosing reference surfaces
Select two adjacent sides of the element, and if they are not flat, plane them to create reference surfaces.
2. Marking the reference surfaces
We mark them with symbols, e.g. the classic F or simply X (blue mark in Figure 5).
3. Marking
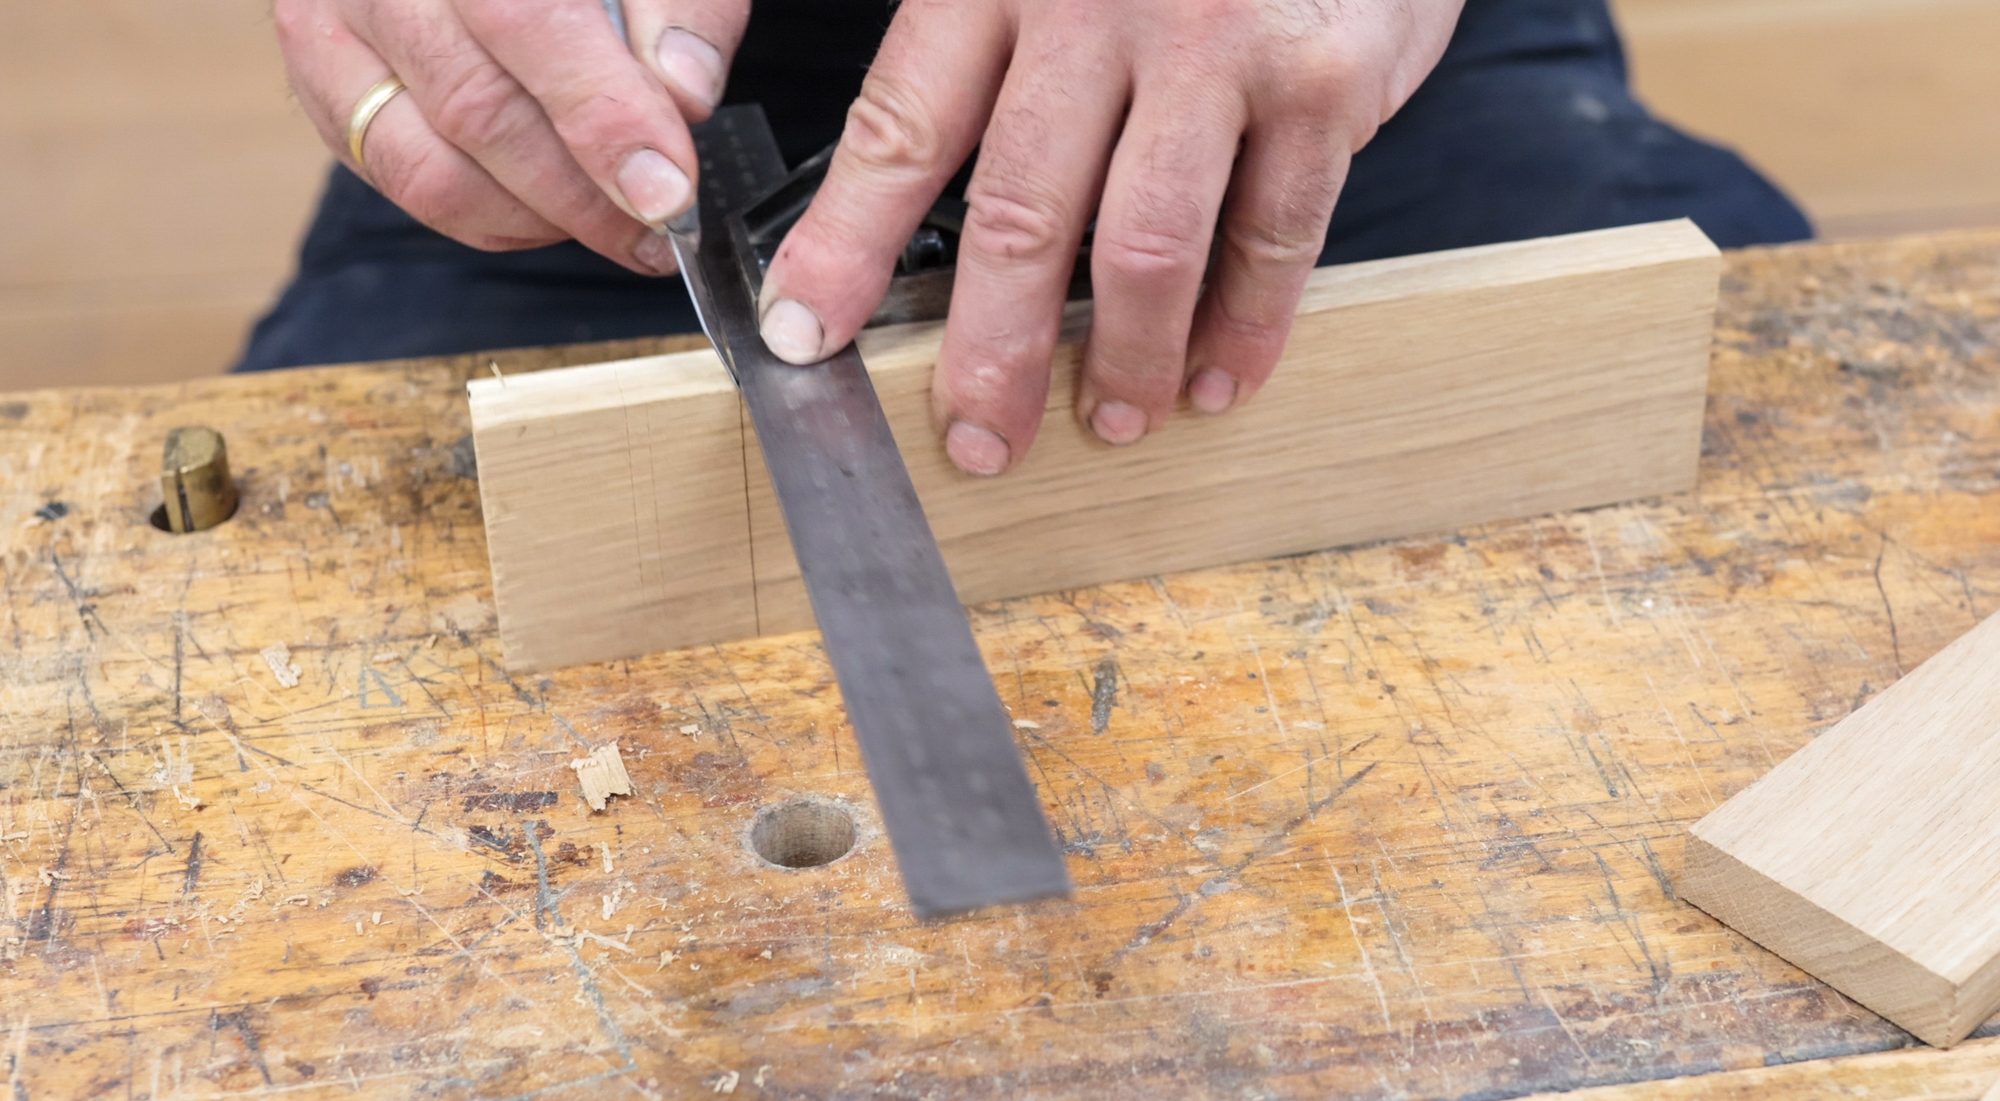
No matter which side we start from, or which way we rotate the element, it is enough to always place the square’s stock against one of the two marked reference surfaces. In this way, we can mark the shoulder correctly. See Figure 5.

We place the square’s stock on the first reference surface and mark the first line at the right point (according to the project).
We rotate the element 90 degrees, no matter which way, making sure the square’s stock is against one of the two reference surfaces. We place the knife in the corner where the previous line ended, gently slide the square, and mark the second line. Rotate further and repeat for the third and fourth lines, always keeping the stock against the reference surface.
4. Quality control
The last step is checking whether the lines meet correctly without displacement. If not, we analyze the situation, make corrections, and repeat. If the lines meet in each corner, it means the shoulder has been correctly marked from the tenon.
The most common mistakes when marking shoulders
Even experienced woodworkers make mistakes when marking shoulders. It is worth knowing them to avoid problems in the workshop.
1. Poorly prepared surfaces
Lack of carefully prepared reference surfaces is the most common reason for inaccurate shoulders. Uneven sides make it impossible for lines marked with the square to form a proper plane.
2. A square that is not 90°
A reliable square is essential for woodworking. Even the slightest deviation from 90° can result in an unsightly joint. While a shoulder can be marked at other angles (e.g. with a sliding bevel), for joints designed at a right angle the result will be unsatisfactory.
3. A dirty square
Glue drops or dents in the stock may prevent proper contact with the workpiece. Regularly check your square and keep it clean.
4. Pressing the square too hard against the knife
When marking consecutive lines, pressing the square too firmly against the knife may shift it slightly, causing small deviations. Even minor errors can accumulate into a visible problem at the end.
5. Positioning the square “by eye”
Placing the square without first positioning the knife correctly on the cutting line is a simple way to fail. Light and shadows can trick the eye. Always set the knife in the right spot first, then gently slide the square to it.
6. Poor knife guidance along the square
This is the most common mistake in marking in general. In the article on the basics of marking I explained how to guide the knife correctly to make clean, straight, and precise lines.
Summary
Marking shoulders is one of the basic skills in learning woodworking. Although it may seem simple at first glance, in practice it has a huge impact on the aesthetics and durability of joints – especially in mortise and tenon. Mastering this technique helps avoid mistakes that could ruin many hours of work.
It is worth practicing all three methods of marking, so that in the workshop you can consciously choose the one that best suits the project.
👉 If you want to learn the secrets of working with hand tools in practice, explore different marking techniques, and practice them step by step under the guidance of an instructor, be sure to check out the article on woodworking workshops at Bensari Workshop. It’s the best way to gain solid foundations and turn theory into practice.