

Veneering is one of the oldest and most valued techniques used in woodworking. It allows you to create decorative natural wood surfaces, recreate original veneers, and work with material efficiently and precisely. Simply put, veneering involves applying a thin layer of wood onto a stable substrate to achieve a refined and durable surface. At Bensari Workshop, we teach veneering using traditional methods: hand-applied veneer, hide glue, and hammer veneering. These techniques have formed the foundation of European furniture-making for centuries.
What is veneer?
Veneer is a thin layer of natural wood, typically 0.5–1 mm thick. This form of material allows large surfaces to be shaped with attractive and consistent grain patterns. Veneer also allows for economical use of valuable wood species such as walnut, ebony, rosewood, or mahogany, far more efficiently than solid wood. The French term ébéniste originates from the word *ébéne* (ebony) and refers to a craftsman specializing in ebony veneering and high-art furniture making. Ébénistes were masters of precision veneering, and their work represented the most refined part of European furniture art in the 17th and 18th centuries. Veneer became their signature because it enabled visual and structural effects impossible to achieve with solid wood.
Veneering in ancient Egypt
The history of veneering goes back over 3000 years. The ancient Egyptians used thin sheets of wood to decorate everyday objects and burial furnishings. Veneer was an answer to the scarcity of large trees in the Nile Valley. Thin sheets of valuable wood glued onto cheaper timber provided an attractive surface. In Egypt, veneer was used in coffins, sarcophagi, chests, and various burial furnishings. Egyptians used natural animal glues and pressing techniques surprisingly similar to modern methods. The idea of veneering – a thin sheet of valuable wood glued onto a stable base – has remained unchanged for millennia.
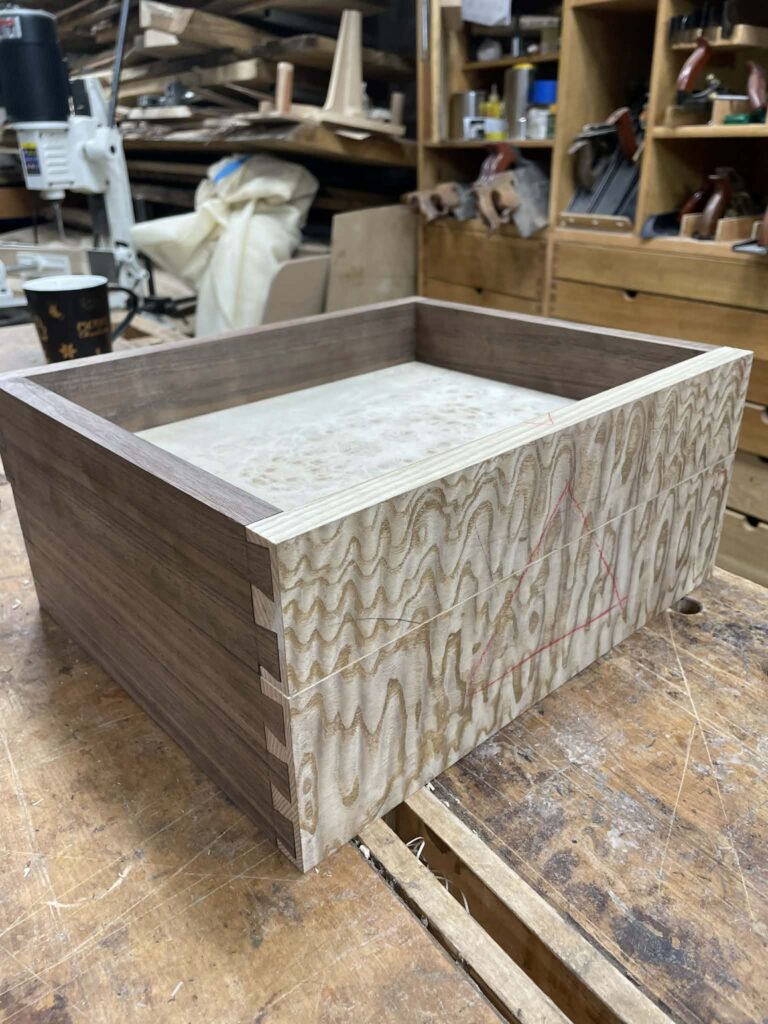
Veneering in furniture restoration
Many antique furniture pieces, especially the more valuable ones, were veneered. Therefore, restoration often involves preparing, repairing, and reconstructing veneer surfaces. Restoration allows missing veneer to be recreated, bubbles removed, delaminations repaired, and the original appearance restored – making veneering one of the most important restoration techniques.
Hide glue – the traditional foundation of veneering
Hide glue is a natural adhesive used in woodworking since antiquity. The most common form is bone glue, though skin, fish, rabbit and other variations exist. These glues are reversible- reacting to heat and moisture – and can be corrected even after drying. This makes them ideal for furniture restoration and traditional veneering. The key advantage of hide glue is reversibility: with moisture and heat, glued parts can be separated again. Contrary to modern myths, this is not always quick or easy. Reversibility, however, allowed furniture to be used and repaired for generations. Some hide glues are even stronger than modern PVA adhesives. For this reason they are still used, for example, in instrument making where extreme tension must be endured. Traditional veneering with hide glue was done either in presses or using a hammer. Veneering presses for hide glue were designed to heat the surface and squeeze out excess glue. This was achieved either through sequential localized pressure or using curved presses that began compressing from the center outward, pushing excess heated glue out. These presses are no longer commercially available today. In hammer veneering, glue is brushed onto the substrate and the veneer, and then the veneer is pressed into place using a veneer hammer which pushes out excess glue without the need for a press.
Preparing hide glue – practice, temperature, and equipment
Hide glue (usually bone or hide-based) is one of the oldest adhesives in woodworking. Despite its simplicity, it requires attention- especially regarding soaking time, temperature, and the vessel used for heating. Bone glue is prepared by soaking dry granules or powder in water and heating it in a water bath at approx. 55–65°C. Pour the granules into a small container and cover with water about 1 cm above the surface. After 30–60 minutes the granules swell into a gel, ready for heating. In practice, many craftsmen soak the glue for several hours to improve uniformity and melting. The next step is heating. Hide glue melts at approx. 55–65°C and should be maintained within this range during use. Too high a temperature destroys proteins responsible for adhesion; too low causes premature gelling. Traditionally, glue is heated in specialized glue pots, but they are expensive – professional units can cost up to 2000 PLN. During veneering courses at Bensari Workshop, we use catering-style bain-marie pots with built-in temperature control. They perform as well as specialized glue pots, maintaining stable heat and ideal working conditions. Traditional techniques do not require expensive equipment -knowledge and skill matter more. Once heated, the glue’s consistency should resemble warm liquid honey. If too thick, add warm water. If too thin, let water evaporate or add a few dry granules. Small adjustments have a major impact on veneering results. Well-prepared bone glue is excellent for veneer work. It becomes plastic when heated, allows adjustments, and crucially – remains fully reversible. For this reason it is often my preferred adhesive when precision is required or when working with closed forms that cannot be veneered any other way. Another advantage is its modifiability. You can adjust open time by adding salt or better – urea. By adding thiourea you can even create a glue that remains liquid at room temperature. To increase elasticity add a little glycerine, and if you require more tack – add vinegar.
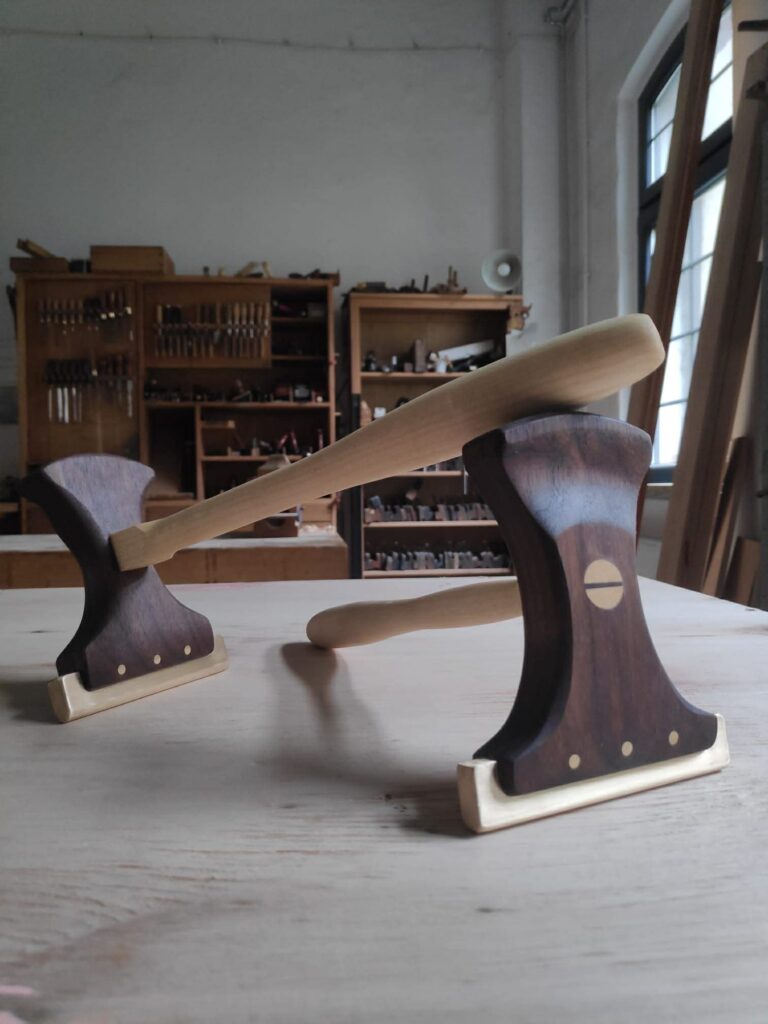
Veneer hammer – a tool that determines the result
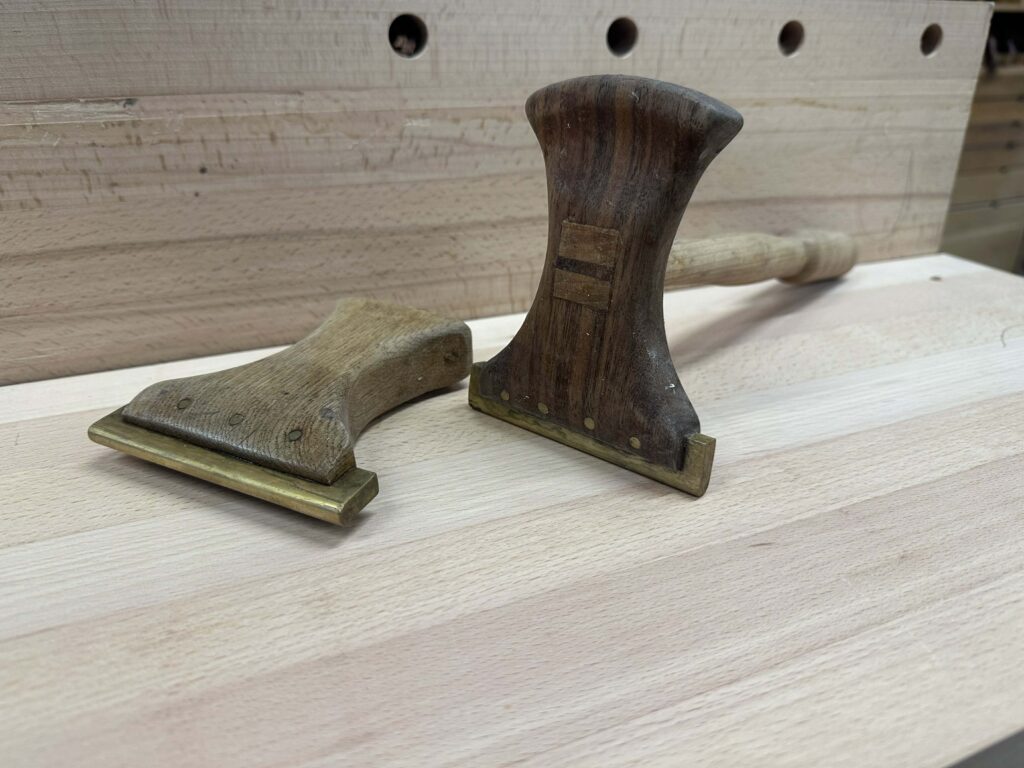
A veneer hammer (regionally called rejba) is used in hammer veneering. It has a metal head mounted onto a wooden or metal handle and is not used for striking, but for pressing veneer during gluing. The hammer is moved across the surface in a smooth zig-zag motion, pushing out hot glue and pressing veneer to the substrate. This technique offers tremendous control, and was used by European craftsmen as early as the 16th century.
Veneer hammers made at Bensari Workshop
We make our veneer hammers by hand, based on traditional designs. The hammer heads are made from brass flat bar. Brass is ideal for veneering – corrosion-resistant, the perfect mass for even pressure, and polishable to a mirror finish. The handle is shaped for comfort, balance and precision. Students use these hammers during courses, learning the technique with tools designed specifically for veneering. Commercial metal veneer hammers exist, but usually lack refinement and ergonomics.
Hammer veneering vs vacuum veneering – comparison
Modern veneering can be done using hydraulic presses, membrane presses, or vacuum bags. In our workshop we use both vacuum veneering and traditional hammer veneering. Both have strengths, depending on the situation.
Hammer veneering
We always prioritize quality, and choose methods accordingly. Hammer veneering excels when precision is needed in complex or irregular forms. Hide glue can be reactivated with heat – so mistakes are correctable. This technique gives excellent material feedback; you see veneer behavior in real time. We use it, for example, when veneering the central cavity of an audio cabinet – accessible only after assembly – and for precision jointing and delicate detailing.
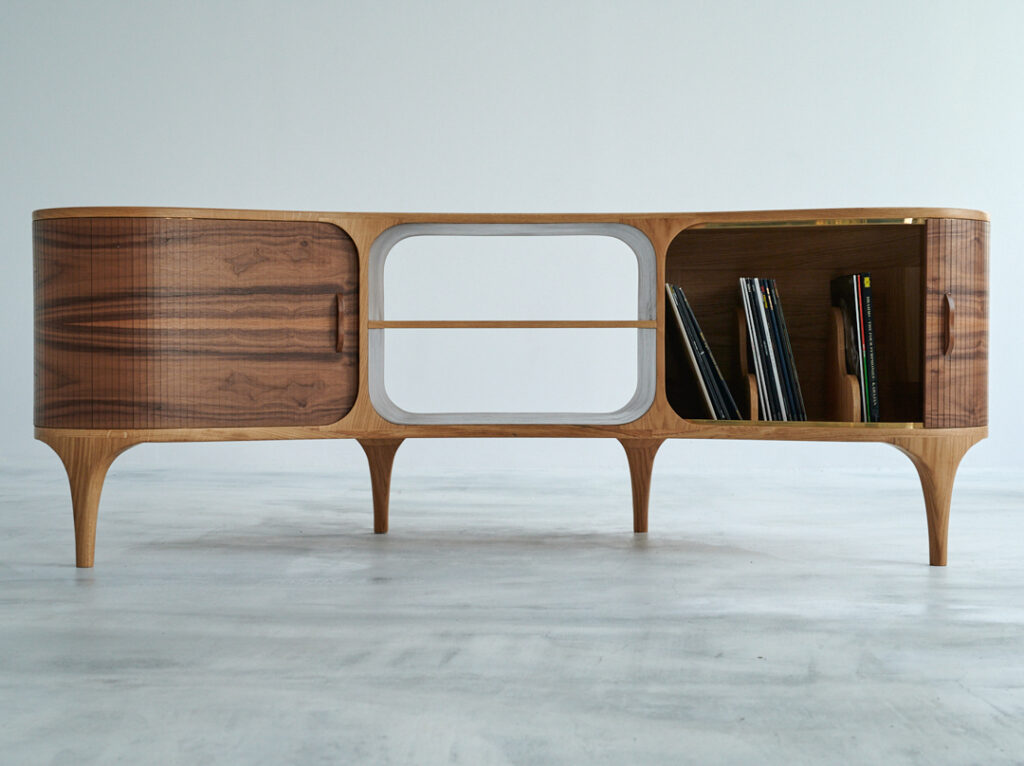
Vacuum veneering
This method excels on flat or open convex surfaces. It is the most universal of modern techniques – though more time-consuming. Vacuum pressure creates strong, even compression over the entire surface. Ideal for panels, drawer fronts and bottoms, tambour doors, and convex/concave elements. When uniform full-surface pressure is needed, vacuum veneering has no rival.
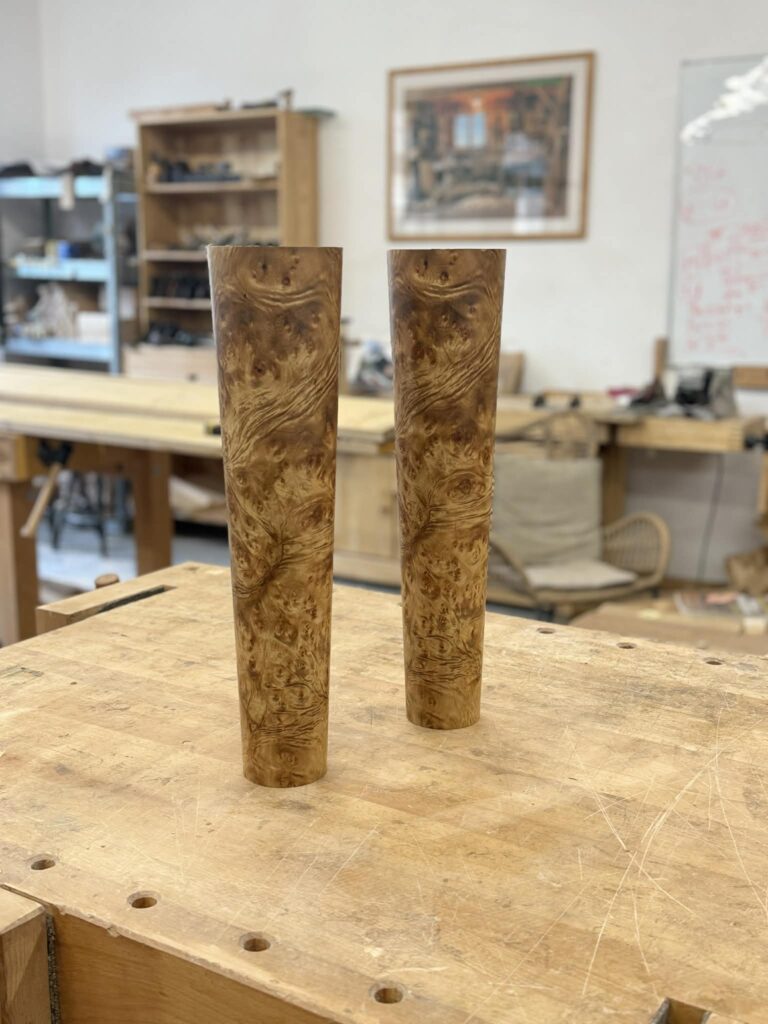
In practice, both methods complement each other. Hammer veneering offers control on complex forms, while vacuum veneering ensures uniform pressure on larger and simpler components. Sometimes the best results come from combining both, as in our veneered table lamp components:
Tools & accessories for veneering – practical guide
Veneering requires precision and a properly prepared workspace. Good tools make the process easier and allow the veneer to reach its full potential. Below is the equipment we use daily at Bensari Workshop and during workshops. It is not a long list of expensive tools – traditional craft values knowledge and skill above equipment. For beginners, see our guide to basic woodworking tools. You will also find veneering videos on our YouTube channel.
Marking knife / veneer knife
Cutting veneer requires a truly sharp blade. A dull knife tears fibers, making joining and gluing harder. Both dedicated veneer knives and sharpened marking knives work well.
Veneer hammer
A core tool in traditional veneering. The smooth metal blade presses veneer, expels glue, and stabilizes the sheet. We use workshop-made brass and wood hammers – designed for balance, weight, and surface quality.

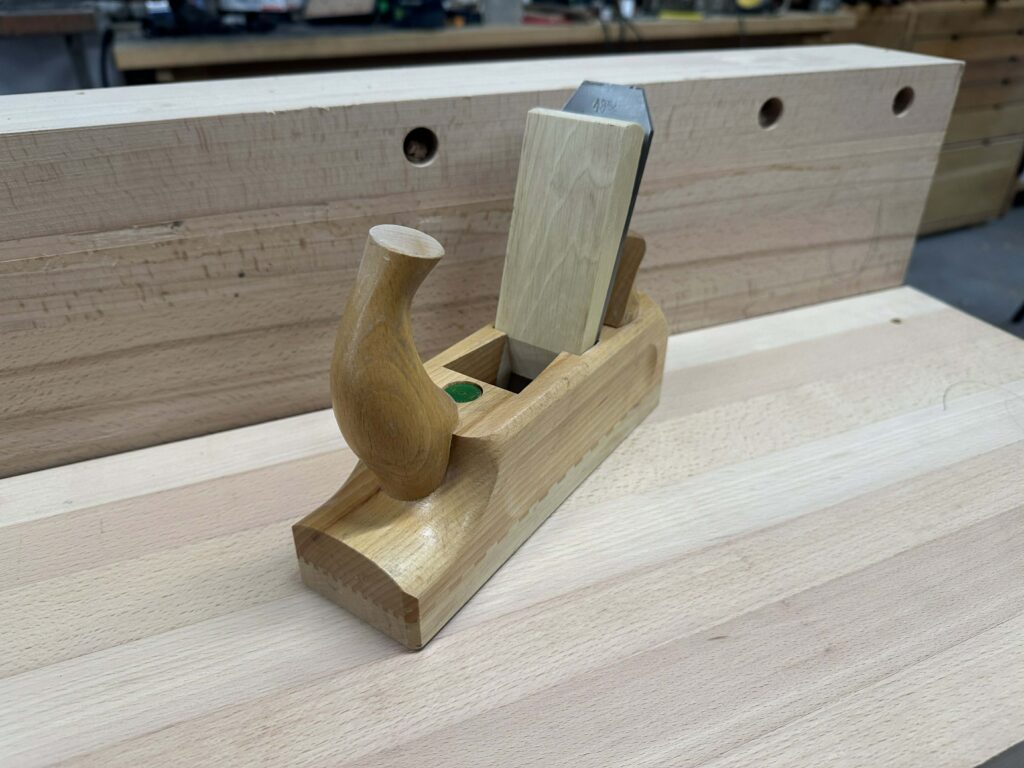
Toothed plane
Creates fine micro-grooves on surfaces. While many say the purpose is to increase bonding area, its real advantage is mechanical – hide glue shrinks as it dries, pulling veneer tightly. Micro-grooves enhance this effect, strengthening adhesion. Not essential, but very useful for large surfaces.
Bone glue / hide glue
Fundamental to traditional veneering – natural, durable, reversible, and highly controllable. Requires constant temperature. Suitable for beginners and professionals alike.
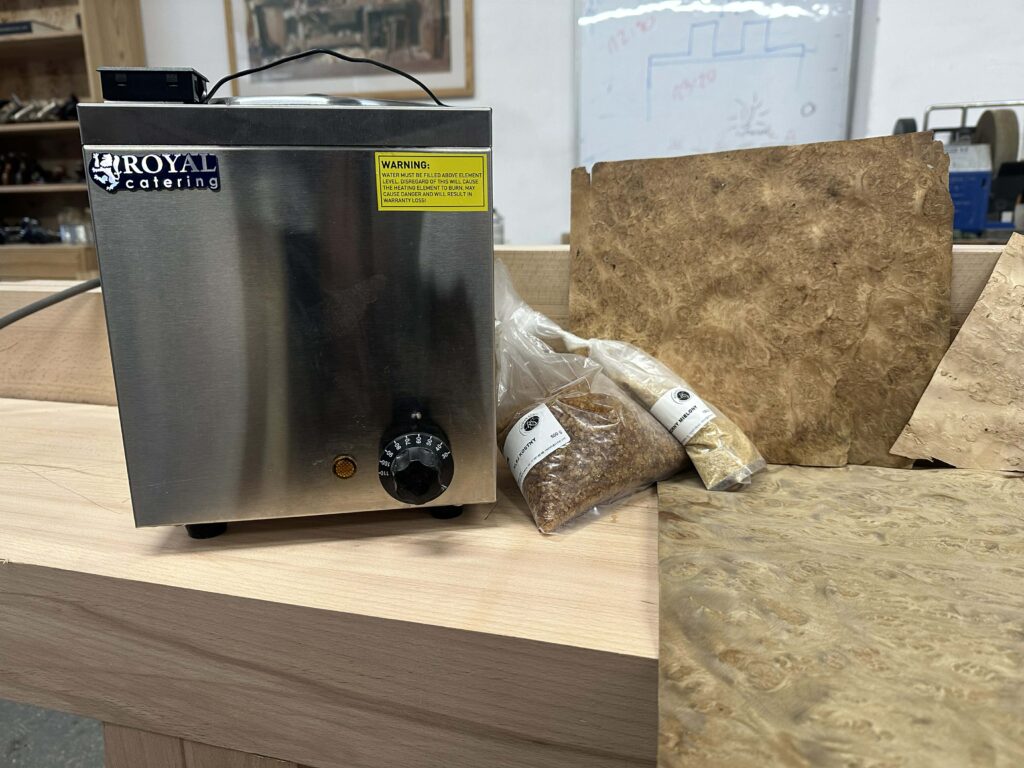
Glue heating pot
Instead of costly glue kettles, we use catering bain-marie pots with temperature control. They maintain 55–65°C reliably even under heavy use.
Glue brush
Should withstand heat, clean easily, and not shed bristles. Fast even spreading is essential – especially on large sheets.
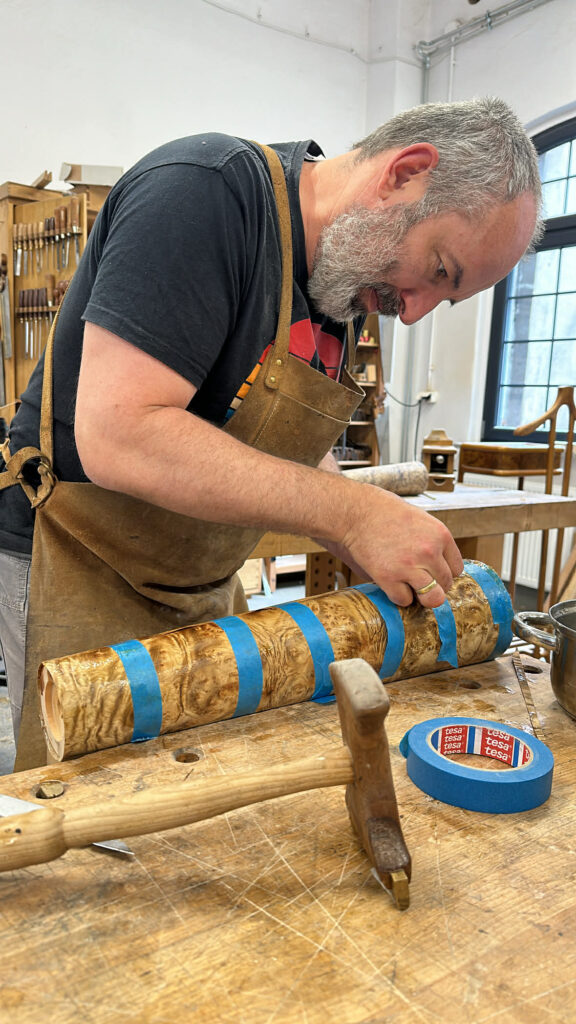
Veneer tapes
Useful in different types: water-activated paper tape for joint reinforcement; white non-perforated tape ideal for hammer veneering; single-perforation tapes for sanding; and multi-perforation tapes for pre-assembly veneer joining (these remain inside the veneered layer).
Veneering course at Bensari Workshop
Our two-day hammer-veneering and steam bending course introduces a technique practiced by European ébénistes for centuries. Participants build a tray with bent handles and veneered base, learning:
- veneer preparation,
- working with hide glue,
- hammer veneering techniques,
- veneer repair and reconstruction,
- basics of steam bending,
- shellac finishing.
Hammer veneering is a craft combining history, precision, and the satisfaction of hand work. Learn more about the course.
Summary
Veneering is a technique with long history and exceptional craft value. From ancient Egypt to French ébénistes to modern workshops – its fundamentals remain unchanged. A thin layer of veneer, natural hide glue, and a well-made hammer enable beautiful and durable furniture. If you’d like to learn this technique hands-on, visit Bensari Workshop in Wrocław, where we teach veneering step-by-step – just as it has been done for centuries.
FAQ – Veneering & traditional techniques
What is veneer?
A thin layer of natural wood, usually 0.5–1 mm thick, applied onto a stable substrate to create a decorative and durable surface.
Why was veneering used in ancient Egypt?
Because wood was scarce and expensive. Veneering cheaper wood with thin sheets of precious species allowed creation of luxury furniture with limited resources.
What is veneer used for in restoration?
To recreate missing veneer and restore the original appearance of furniture. It is essential in historical restoration.
What glue is best for veneering?
Hide glue (usually bone or skin-based) is the best traditional adhesive because it is reversible – warming allows reactivation and corrections even after drying.
How do you prepare hide glue?
Soak granules in water, then heat to approx. 55–65°C until the consistency resembles warm liquid honey. Correct viscosity is crucial.
What is a veneer hammer?
A hammer-like tool used to press veneer and expel excess glue.
What does “rejba” mean?
A historical Silesian/Lower-Silesian term for a veneer hammer, originating from the German *Reibe*, meaning rubbing or squeezing.
What was an ébéniste?
A craftsman specializing in veneering, marquetry and artistic luxury furniture.
Can veneering be corrected?
Yes. Because hide glue responds to heat and moisture, veneer can be re-softened and re-pressed.
What will I learn during the veneering course at Bensari Workshop?
You will learn veneer preparation, hide glue work, hammer technique, veneer repair, steam-bending basics, and create a practical project – a tray with bent handles and veneered base.
